Smoked Shotgun Shells (Bacon-Wrapped Manicotti)
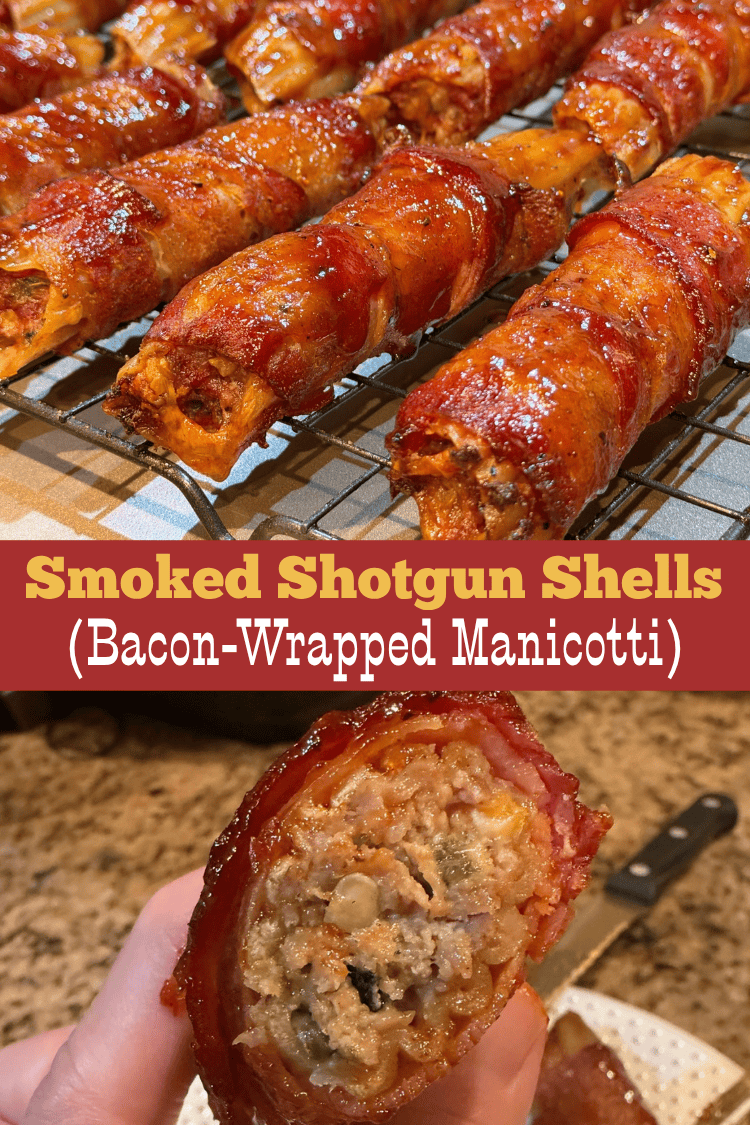
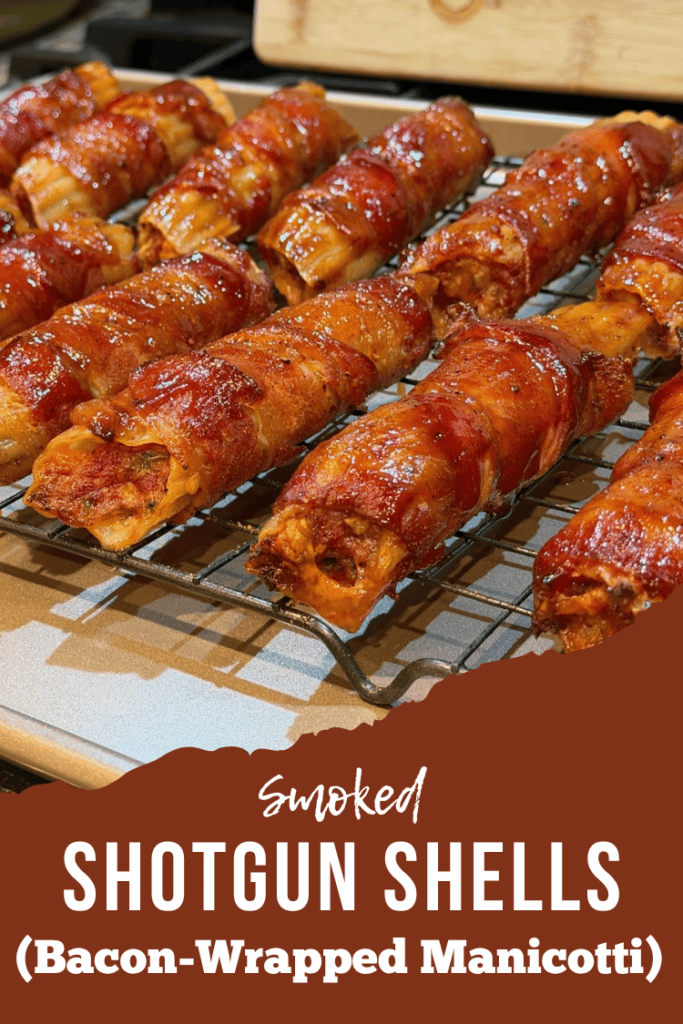
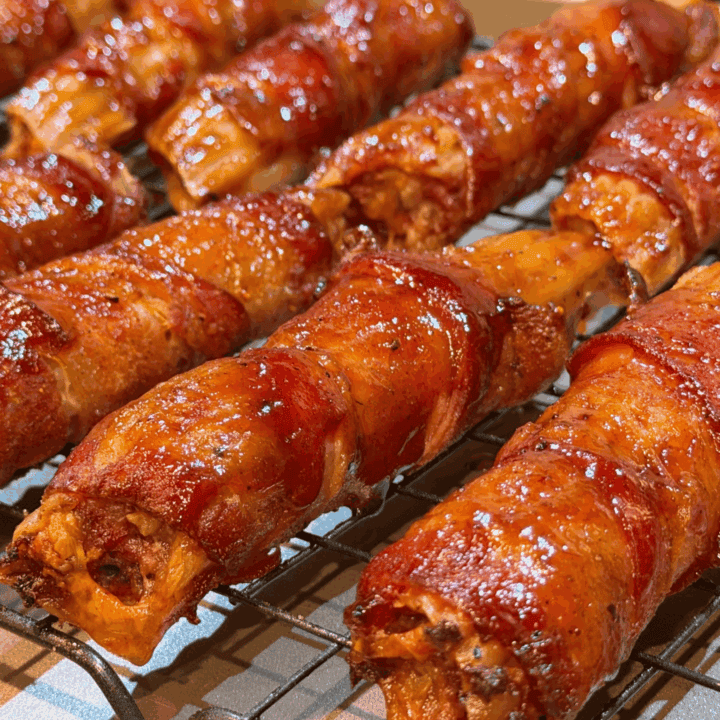
These smoked shotgun shells are stuffed with beef, sausage, cheese, and roasted poblano, wrapped in bacon, and finished with sticky honey BBQ sauce.
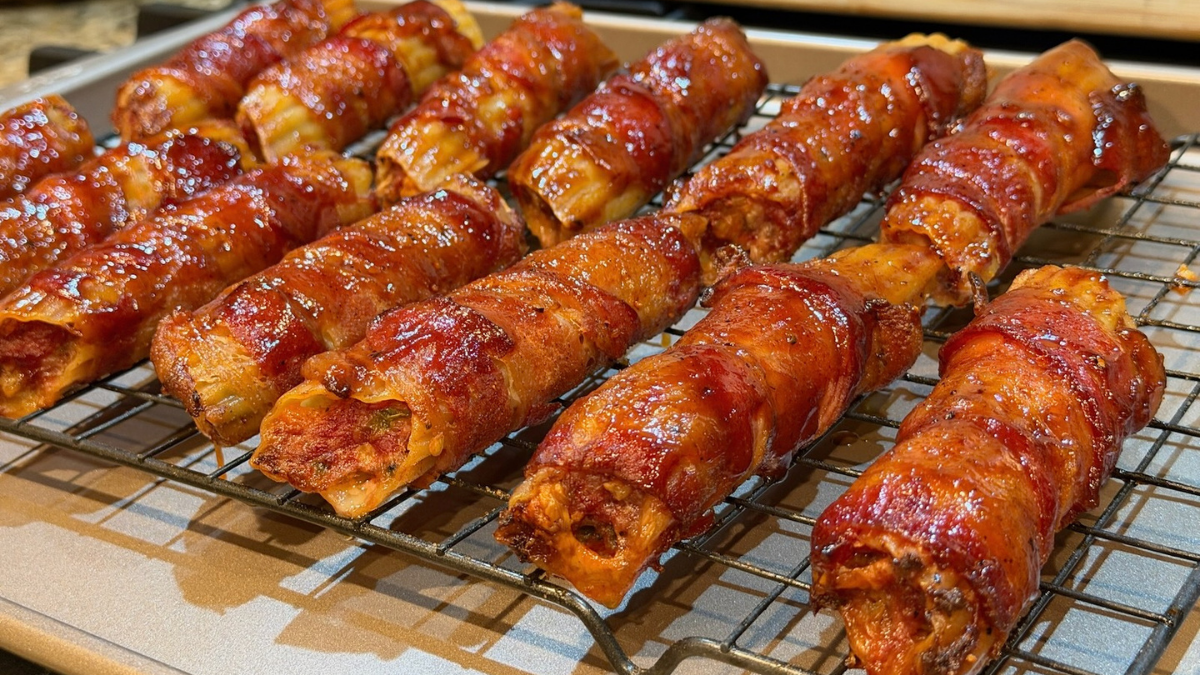
If you've never made smoked shotgun shells before, you're in for a treat.
We stuffed uncooked manicotti shells with a mixture of ground beef, Italian sausage, Colby Jack cheese, cream cheese, and fire-roasted poblano peppers, wrapped them in bacon, and gave them a generous coating of Meat Church Honey Hog seasoning.
Then we let them rest in the refrigerator before putting them on the smoker at 300°F.
After an hour, we brushed them with warm honey barbecue sauce and gave them another 10 minutes on the smoker.
The result was exactly what we were hoping for: savory and smoky with a little heat from the poblanos, plus a sticky sweetness from the Honey Hog seasoning and barbecue sauce.
These are rich, hearty, and definitely made for sharing. Serve them as a backyard barbecue appetizer, game-day snack, or alongside your favorite smoked meats.
You will find a full printable recipe card at the bottom of this post.
Smoked Shotgun Shells at a Glance
Smoker Temperature: 300°F
Cooking Time: 60 minutes + 10 minutes after glazing
Refrigerator Time: At least 4 hours; overnight is even better
Internal Temperature: At least 165°F
Yield: We made 14 shotgun shells and had filling left over
Before we get started, there's one thing you really need to know:
Don't cook the manicotti first.
The dry pasta is stuffed straight from the box. The refrigerator rest gives the pasta time to begin absorbing moisture from the filling before it ever goes onto the smoker.
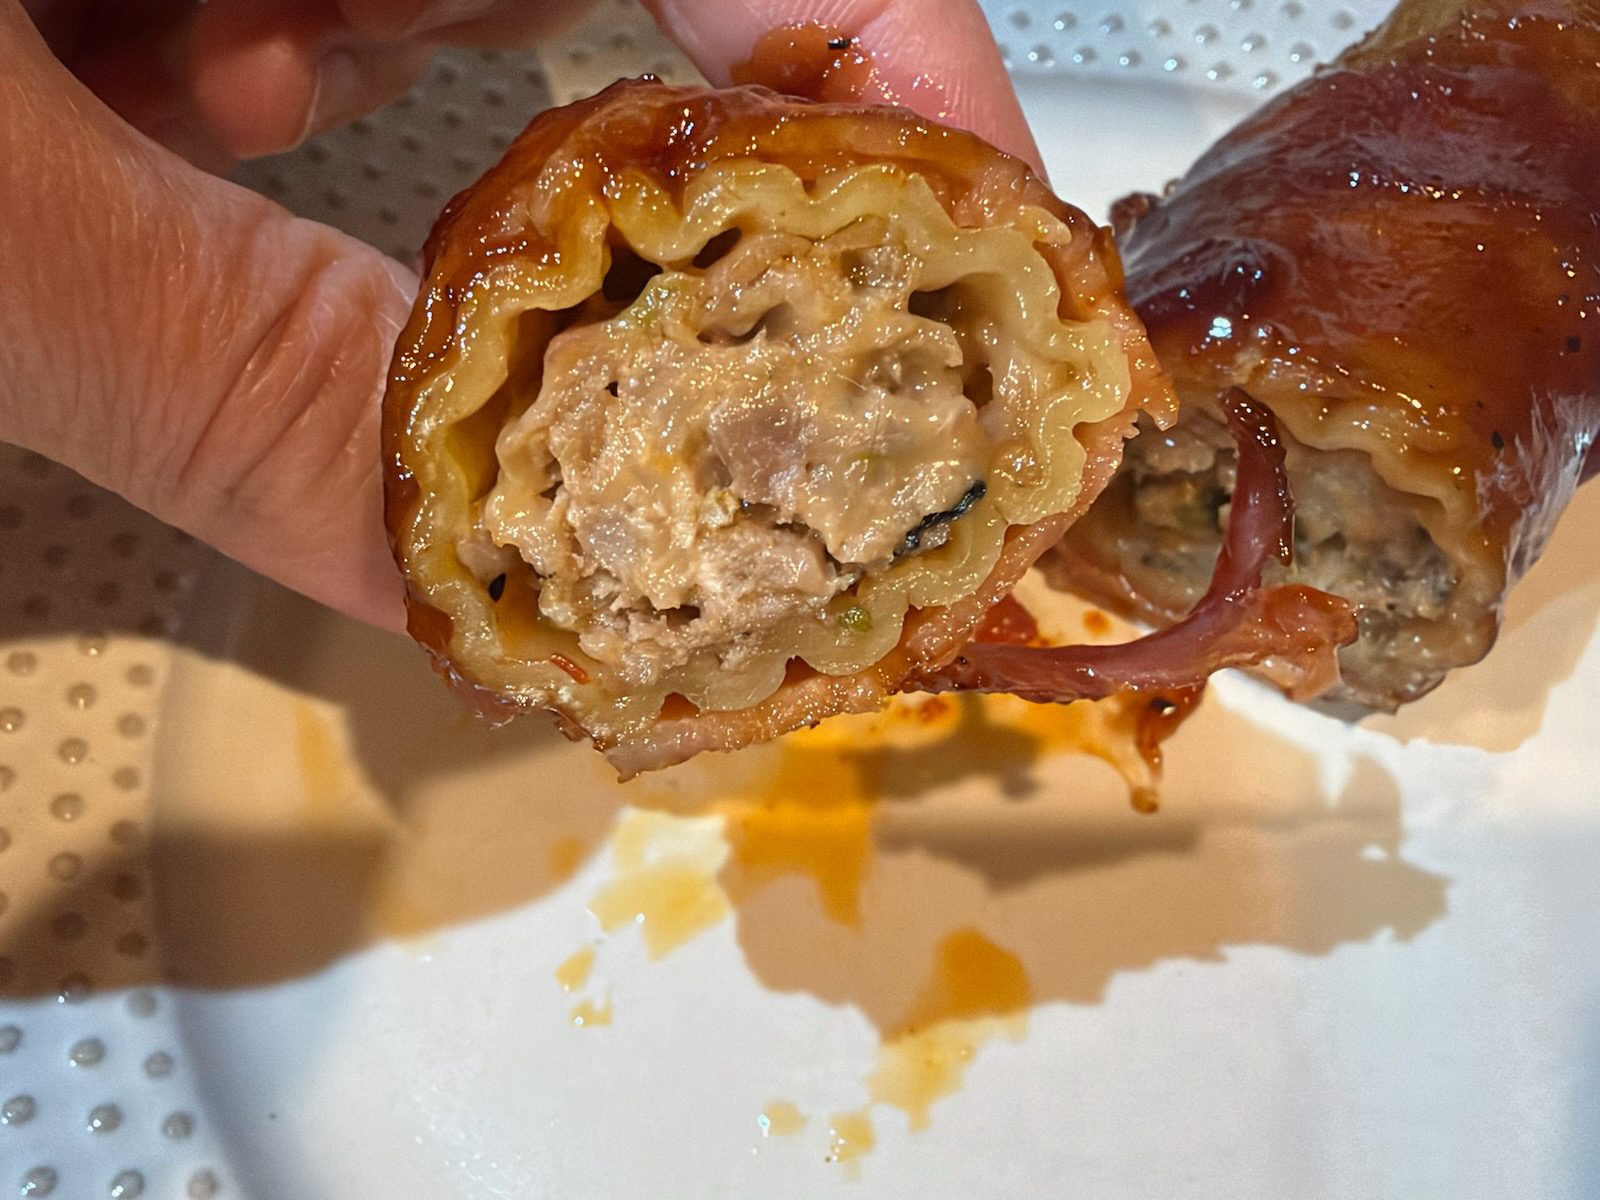
We refrigerated ours for four hours and found that the pasta was tender beneath the bacon, although a few exposed areas remained slightly crunchy.
We actually liked those crunchy bits, but if you want softer pasta throughout, we'd recommend assembling the shotgun shells the night before and refrigerating them overnight.
Ingredients You'll Need
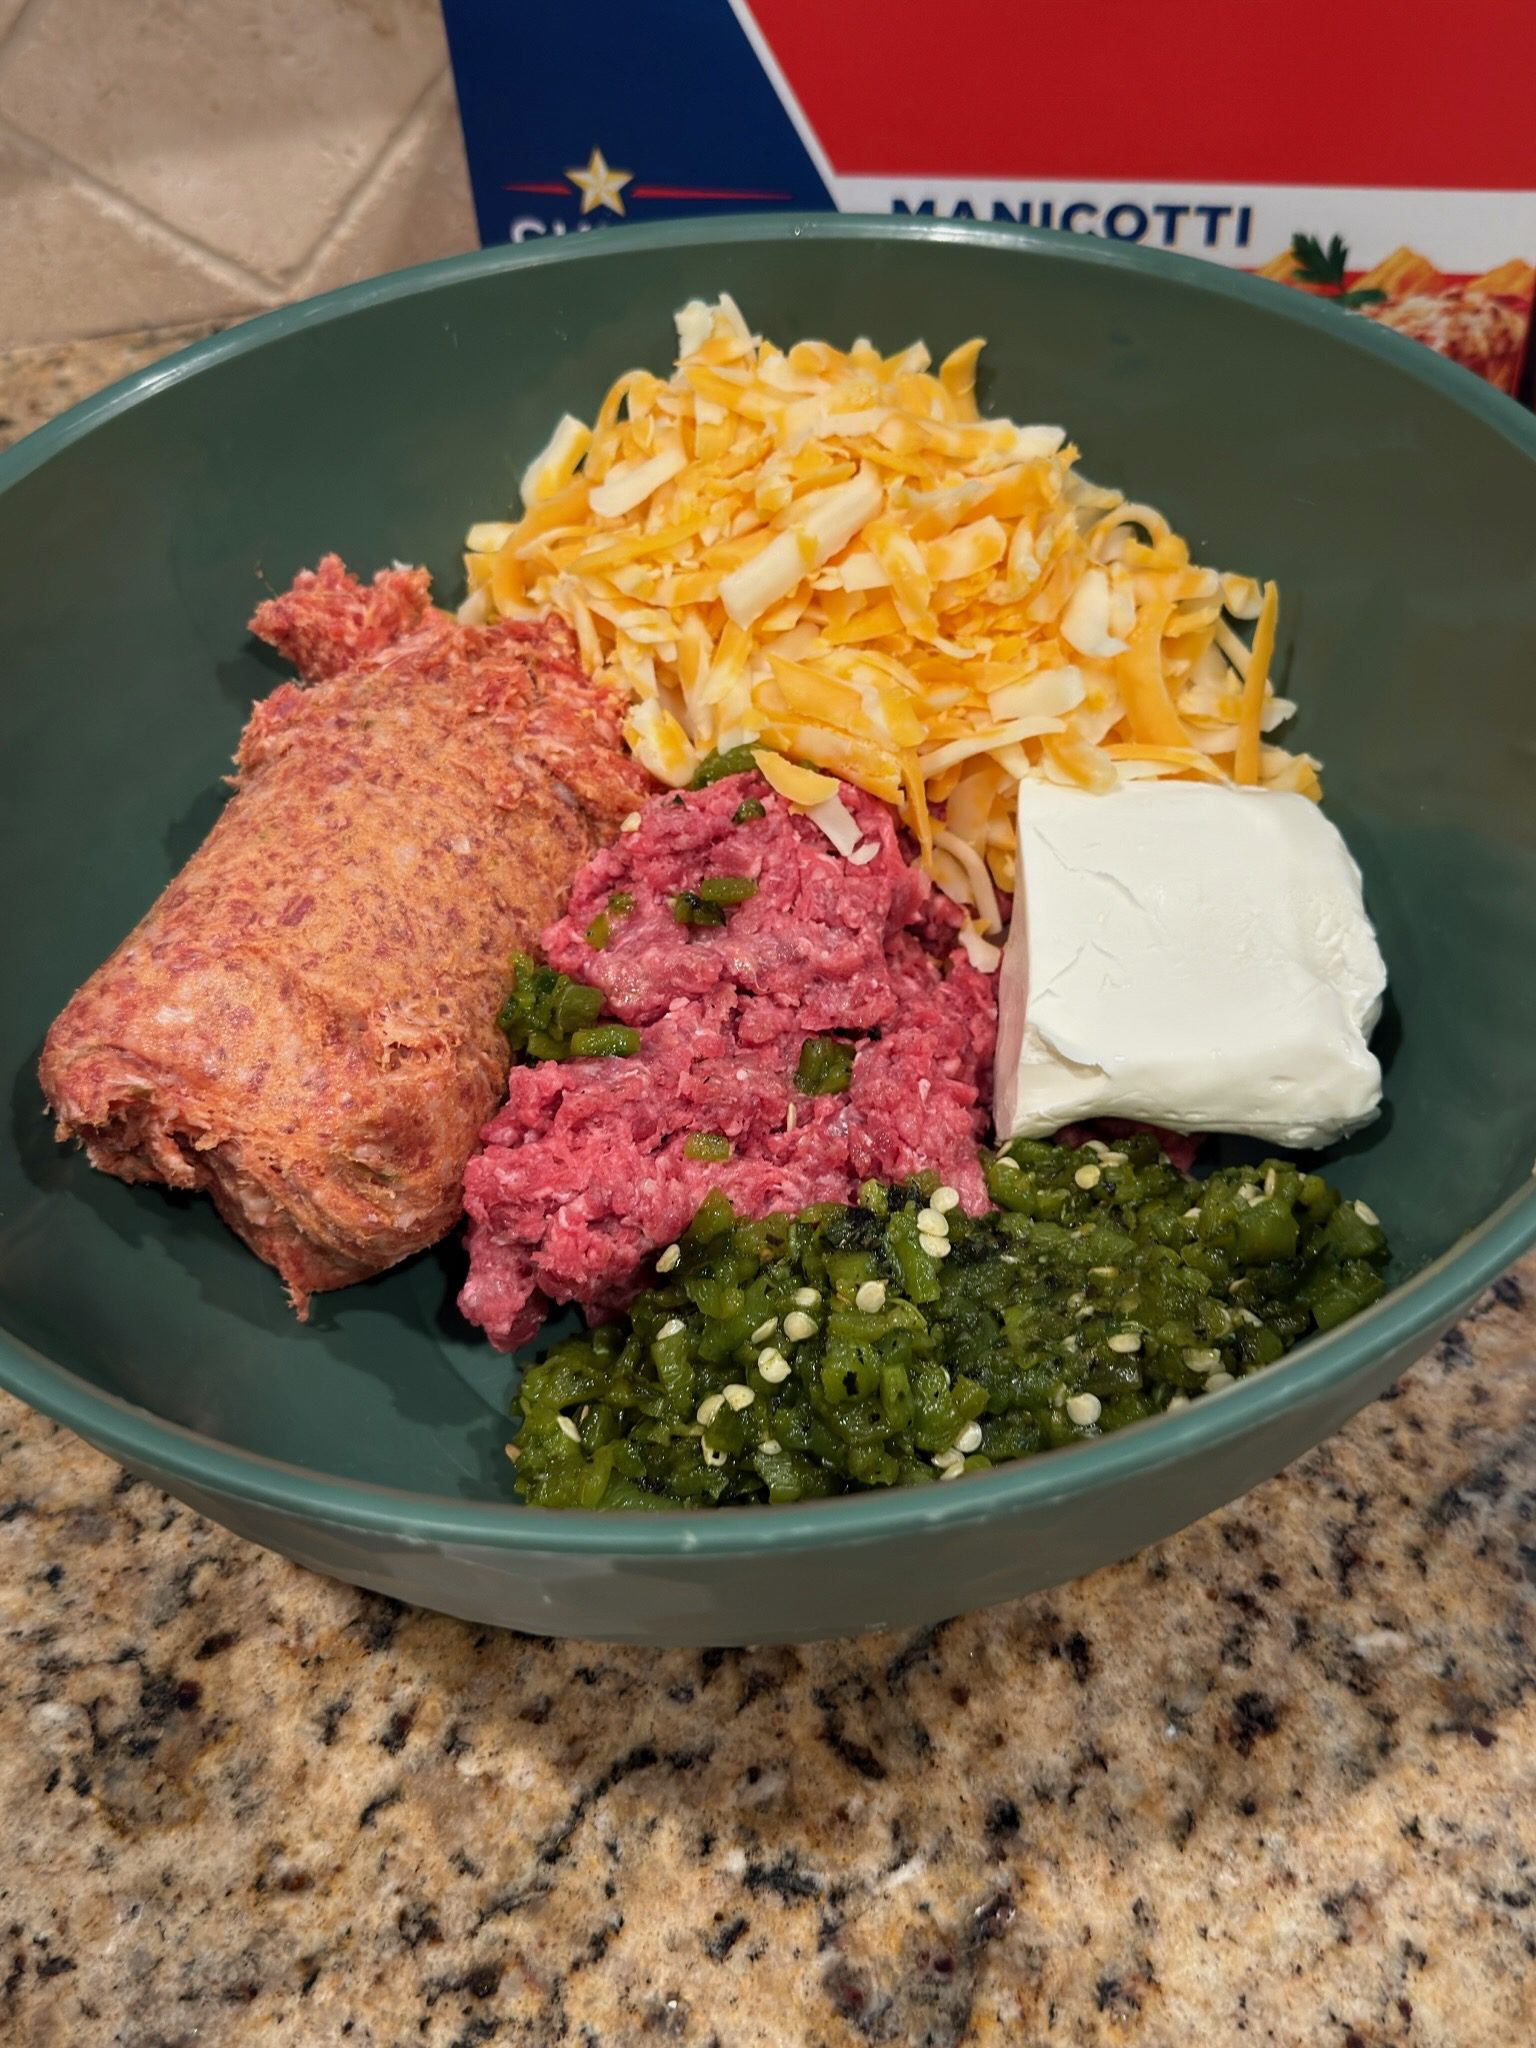
You will find a full printable recipe card at the bottom of this post but here's a peek at what you're going to need. These are simple ingredients you can find at any grocery store.
- 1 pound 85/15 ground beef
- 1 pound ground Italian sausage
- 1 (12-ounce) package thin-sliced bacon
- 8 ounces thick-cut shredded Colby Jack cheese
- 4 ounces cream cheese, softened
- 2 large poblano peppers
- 1 (8-ounce) box manicotti pasta tubes, uncooked
- ½ cup honey barbecue sauce
- Meat Church Honey Hog BBQ seasoning, to taste
We didn't measure the Honey Hog seasoning. We were fairly generous with it, seasoning all sides of the bacon-wrapped shells before they went into the refrigerator.
Fire-Roasting the Poblano Peppers
We used two large poblano peppers for this recipe. Here's the process:
Fire-roast the whole peppers over an open flame, turning them until they're blackened on all sides.
Once they're cool enough to handle, remove the charred skins and stems. Finely chop the softened peppers, including the seeds.
The poblanos give the filling a little heat, but they aren't overwhelmingly spicy. We loved the smoky chile flavor they added to the beef and sausage.
If you prefer, you can substitute jalapeños or Hatch chiles for the poblano peppers.
How to Make Smoked Shotgun Shells
Make the Filling
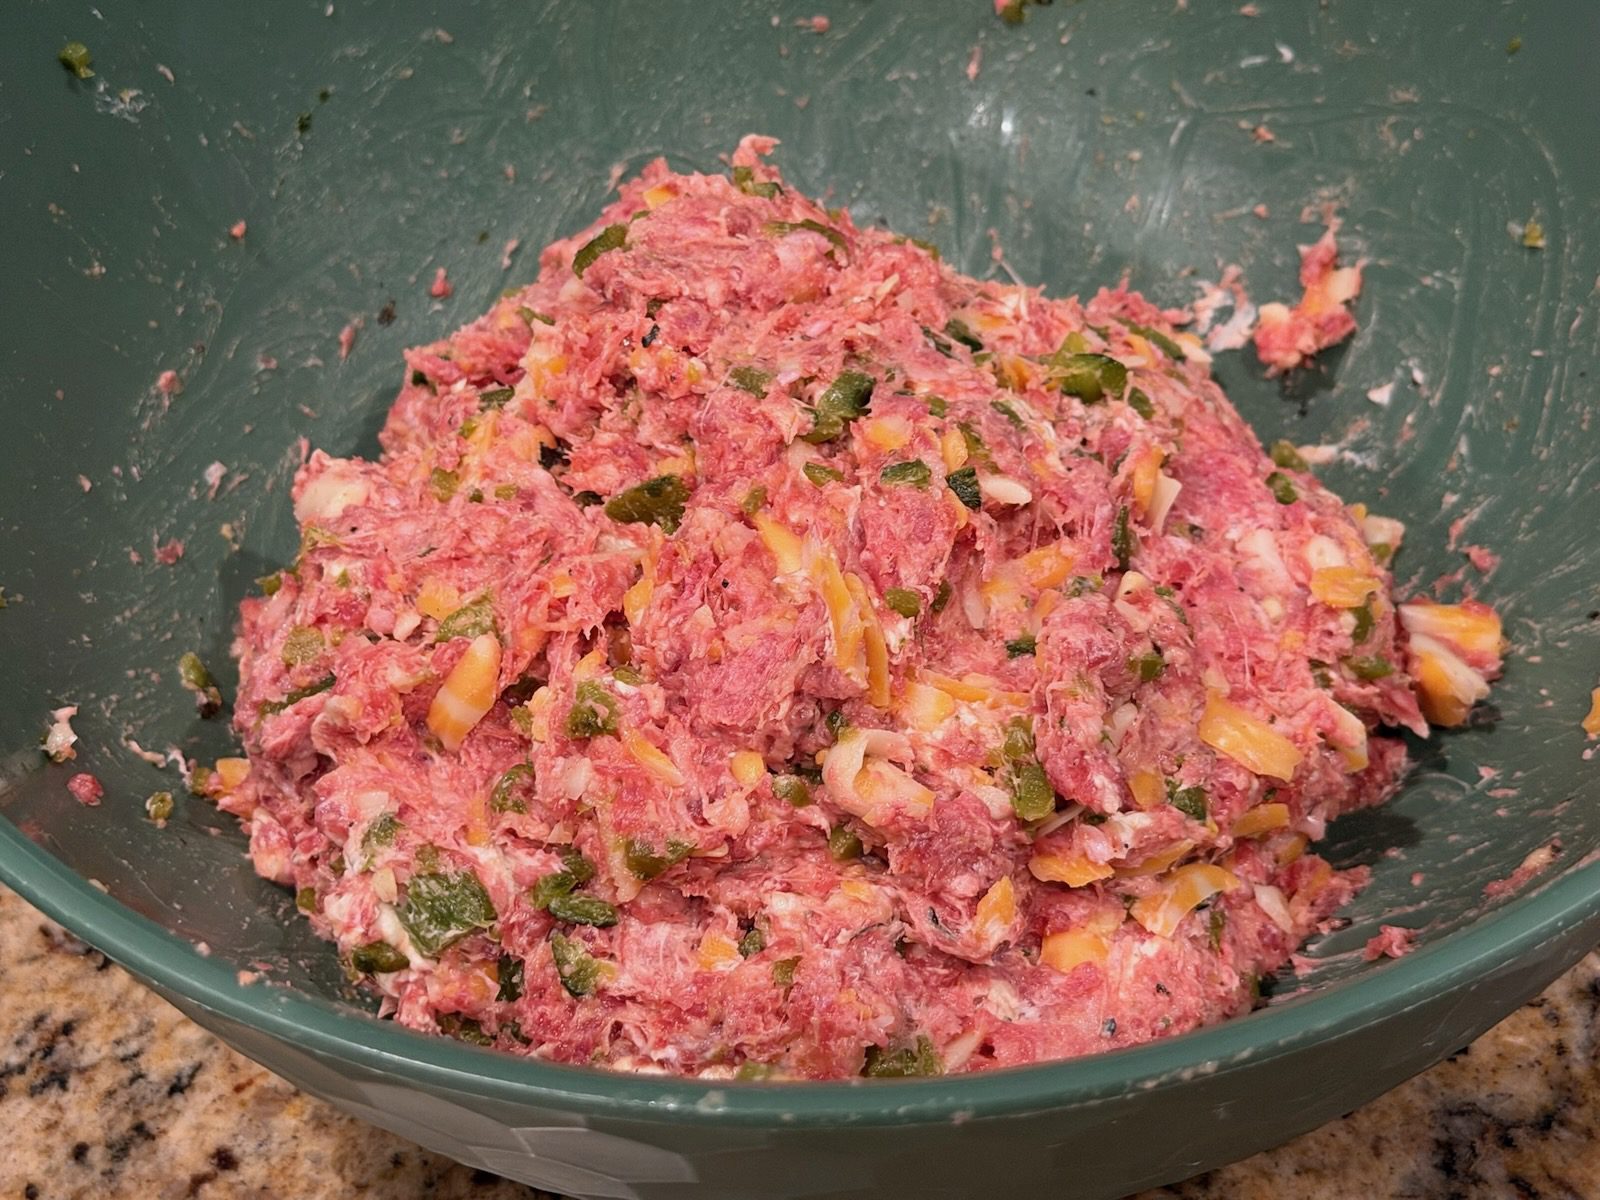
Place the ground beef, Italian sausage, chopped poblano peppers, shredded Colby Jack cheese, and softened cream cheese in a large mixing bowl.
Using gloved hands, work everything together until it's evenly combined.
There's no need to precook the beef or sausage.
Stuff the Manicotti
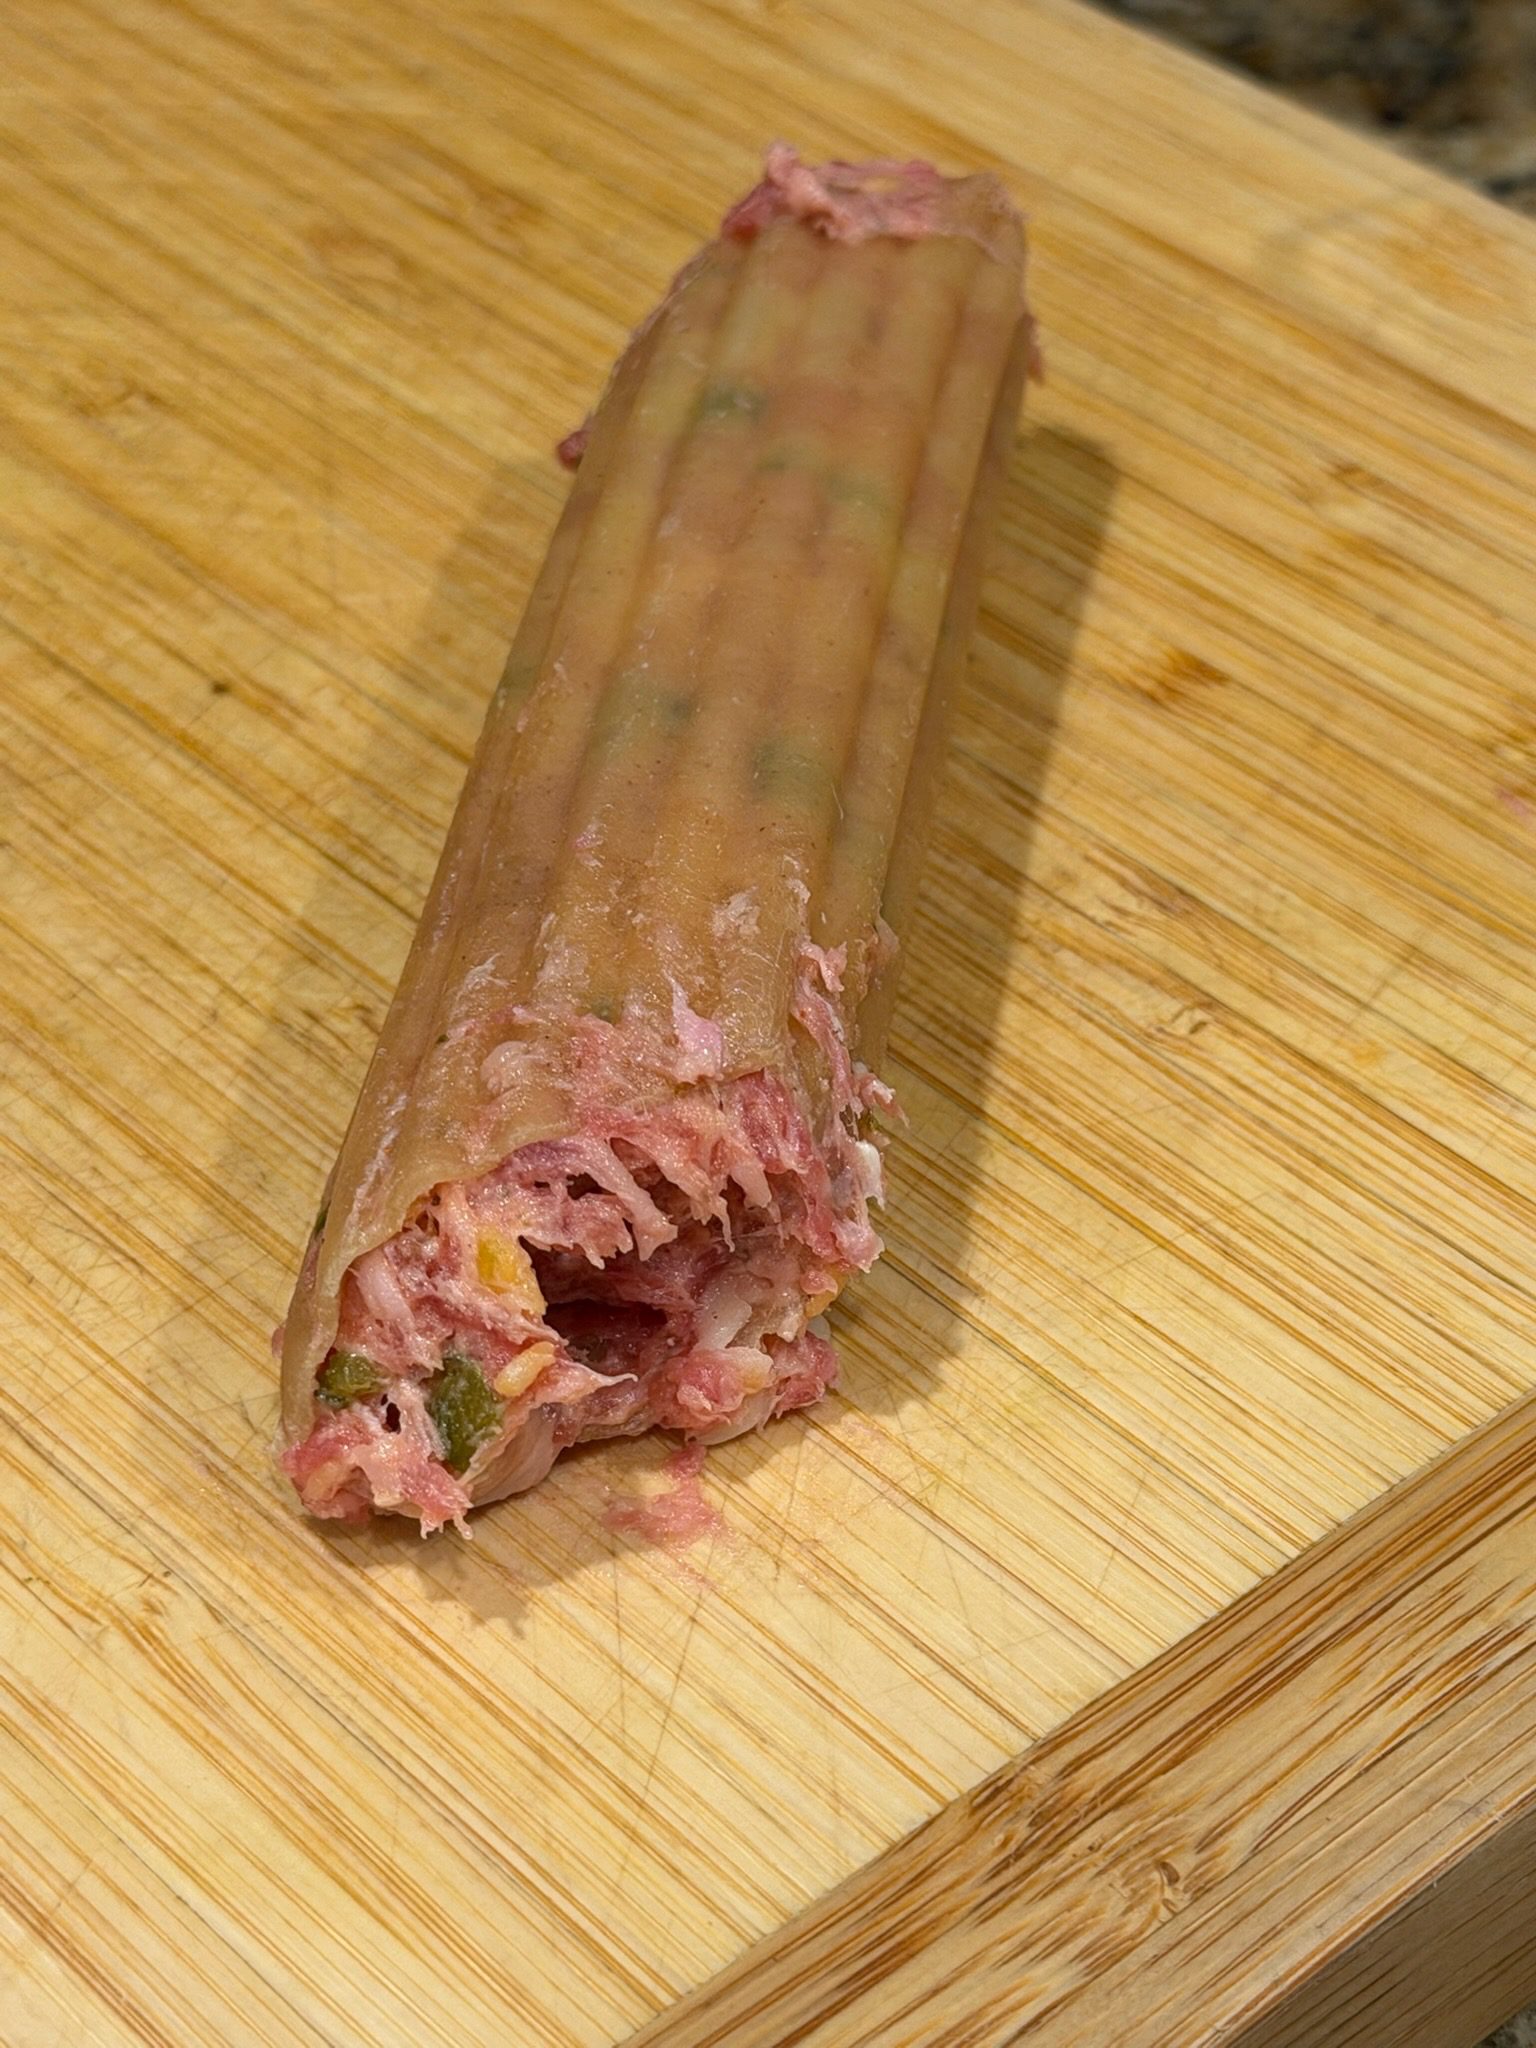
Carefully stuff the meat mixture into the uncooked manicotti tubes.
You can use your fingers or a piping bag for this step.
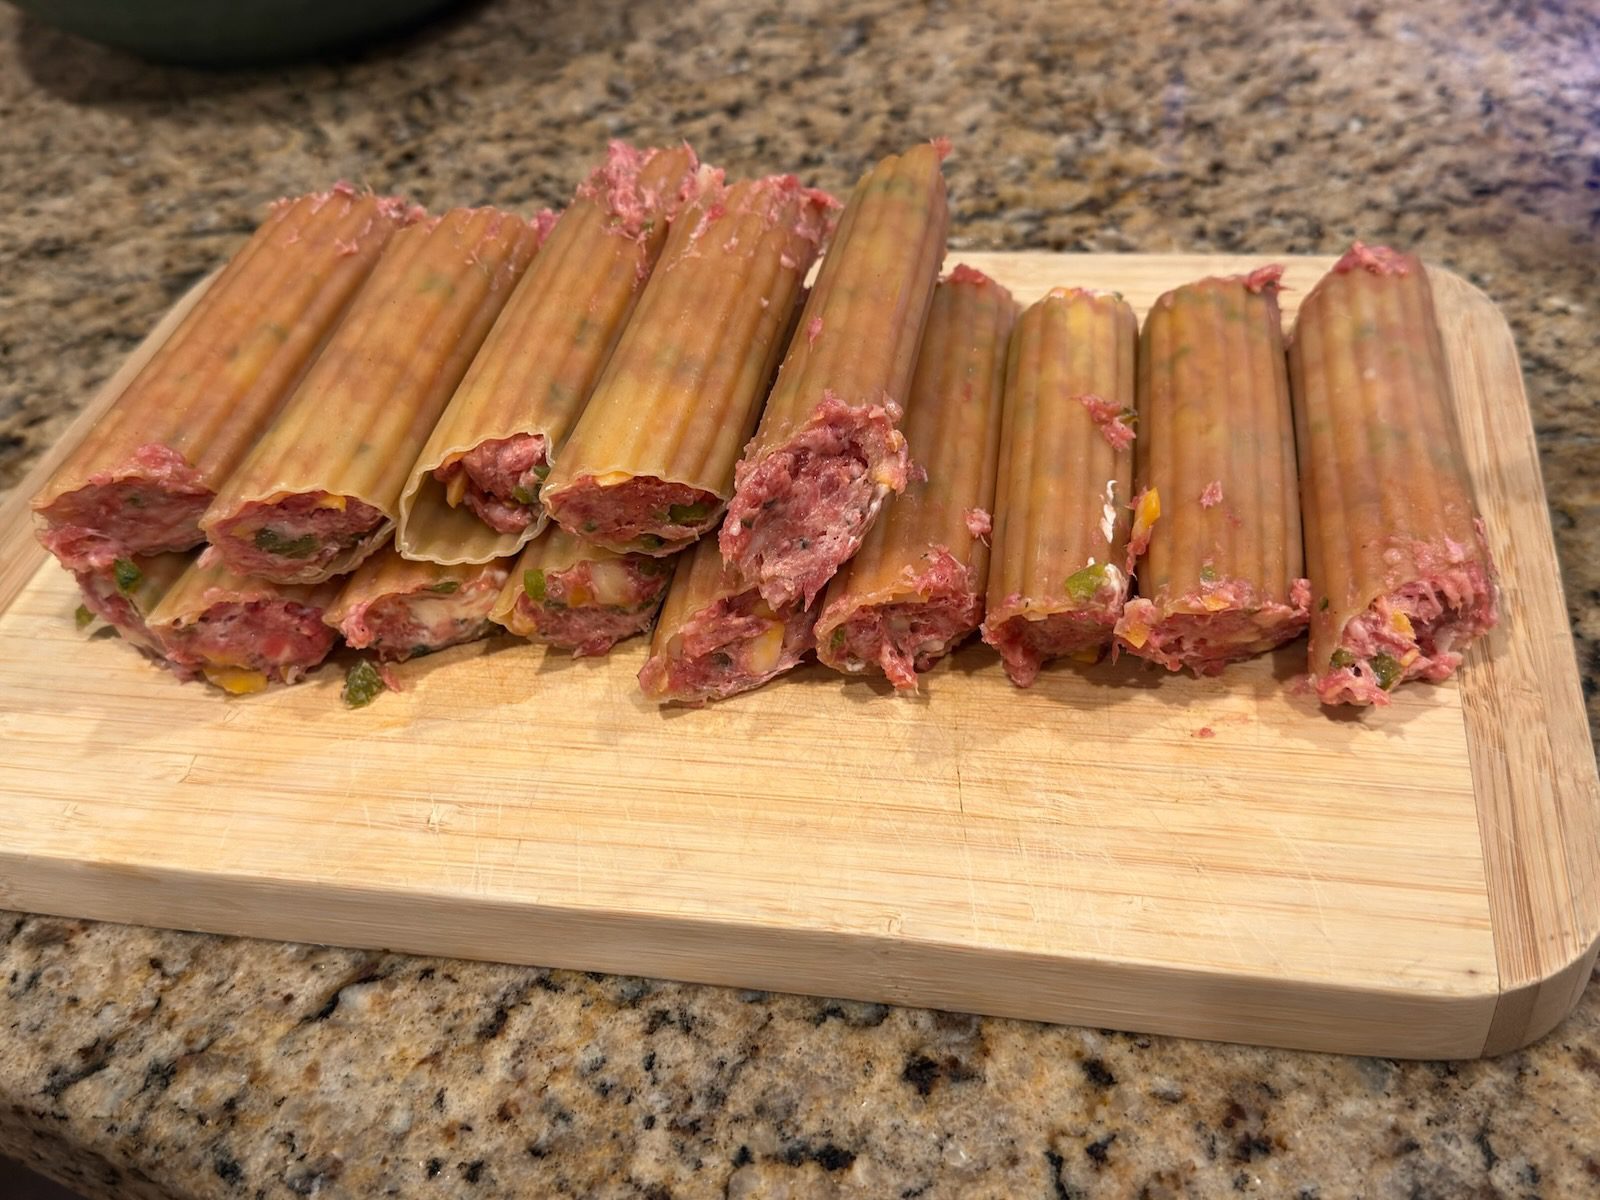
Just take your time. Dry manicotti shells can crack if you squeeze or force them too much.
Make sure the filling reaches all the way through the tube.
Wrap Them in Bacon
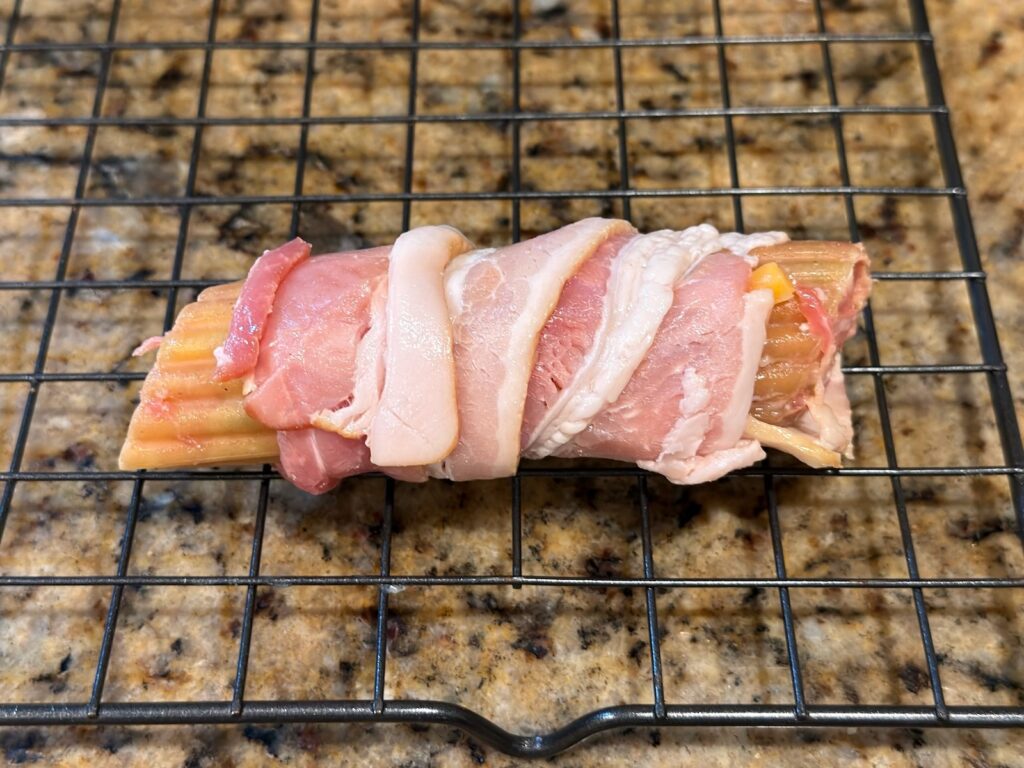
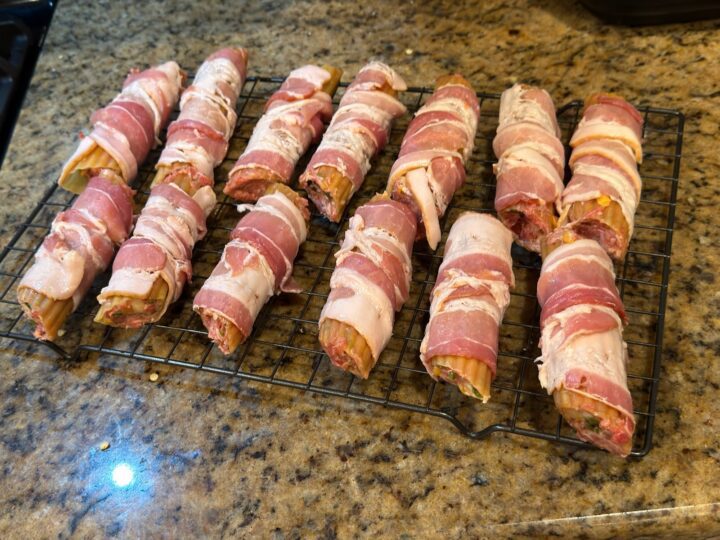
Wrap each stuffed manicotti tube with one piece of thin-sliced bacon, covering as much of the pasta as possible.
We recommend thin bacon for this recipe rather than thick-cut. It wraps around the manicotti more easily and cooks well during the relatively short time these spend on the smoker.
Covering the pasta also helps it stay moist as it cooks.
Add the Seasoning
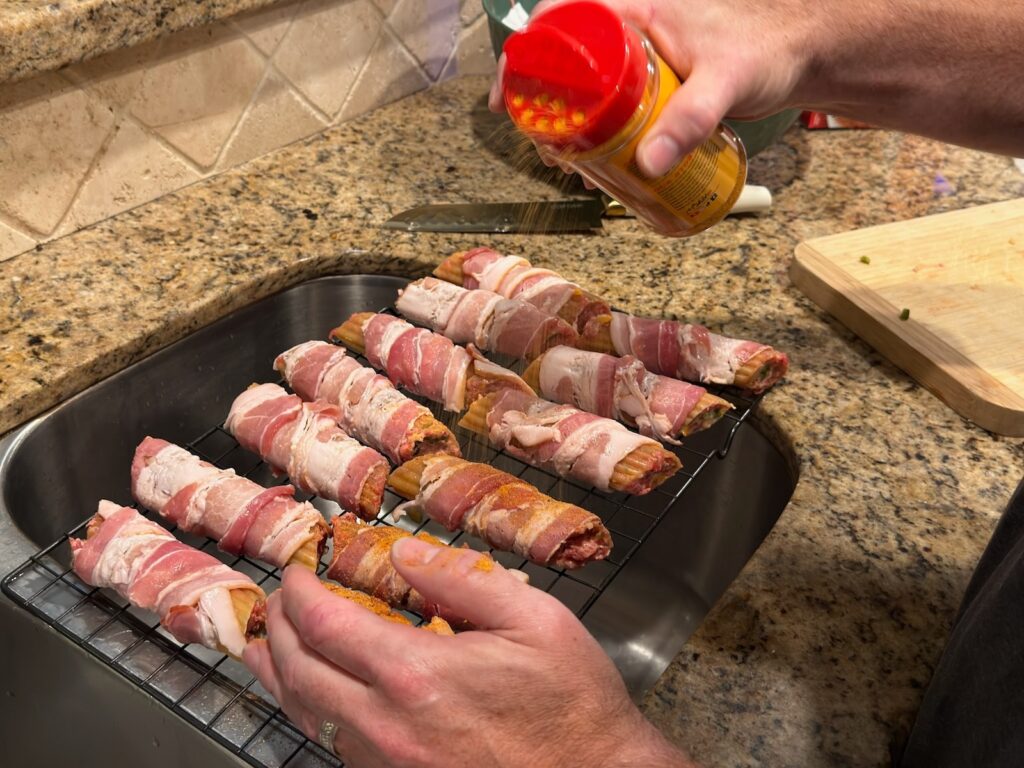
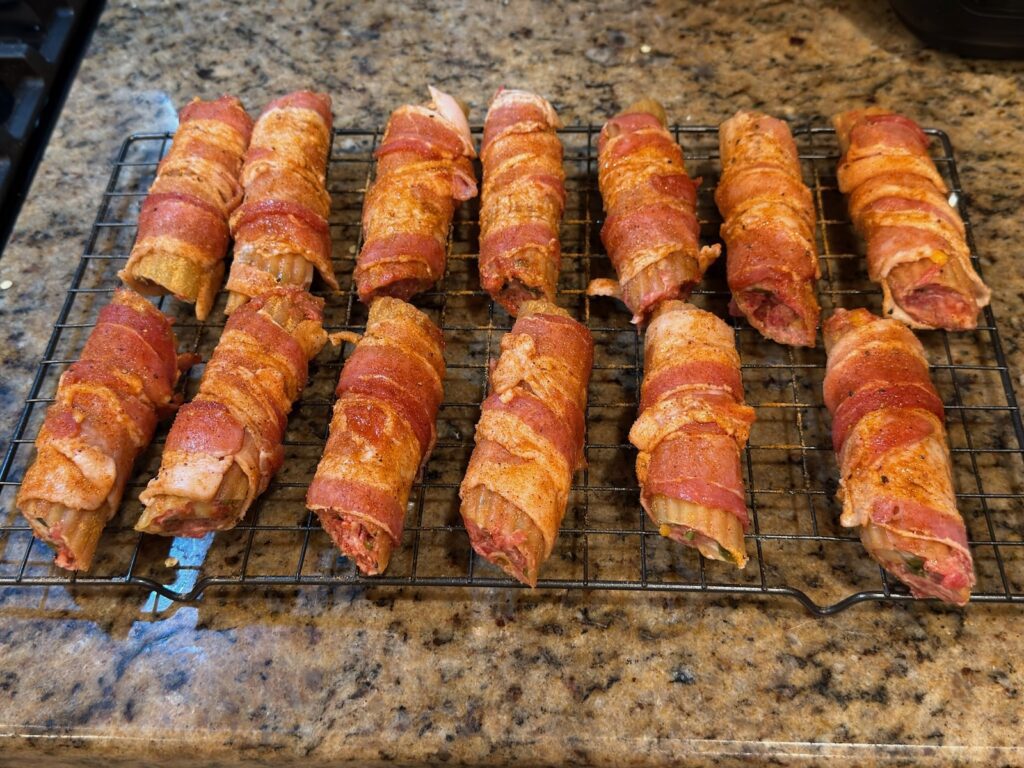
Once the shells are wrapped, season all sides generously with Meat Church Honey Hog BBQ seasoning.
We didn't measure this. Just give each shotgun shell a good coating.
Refrigerate for at Least Four Hours
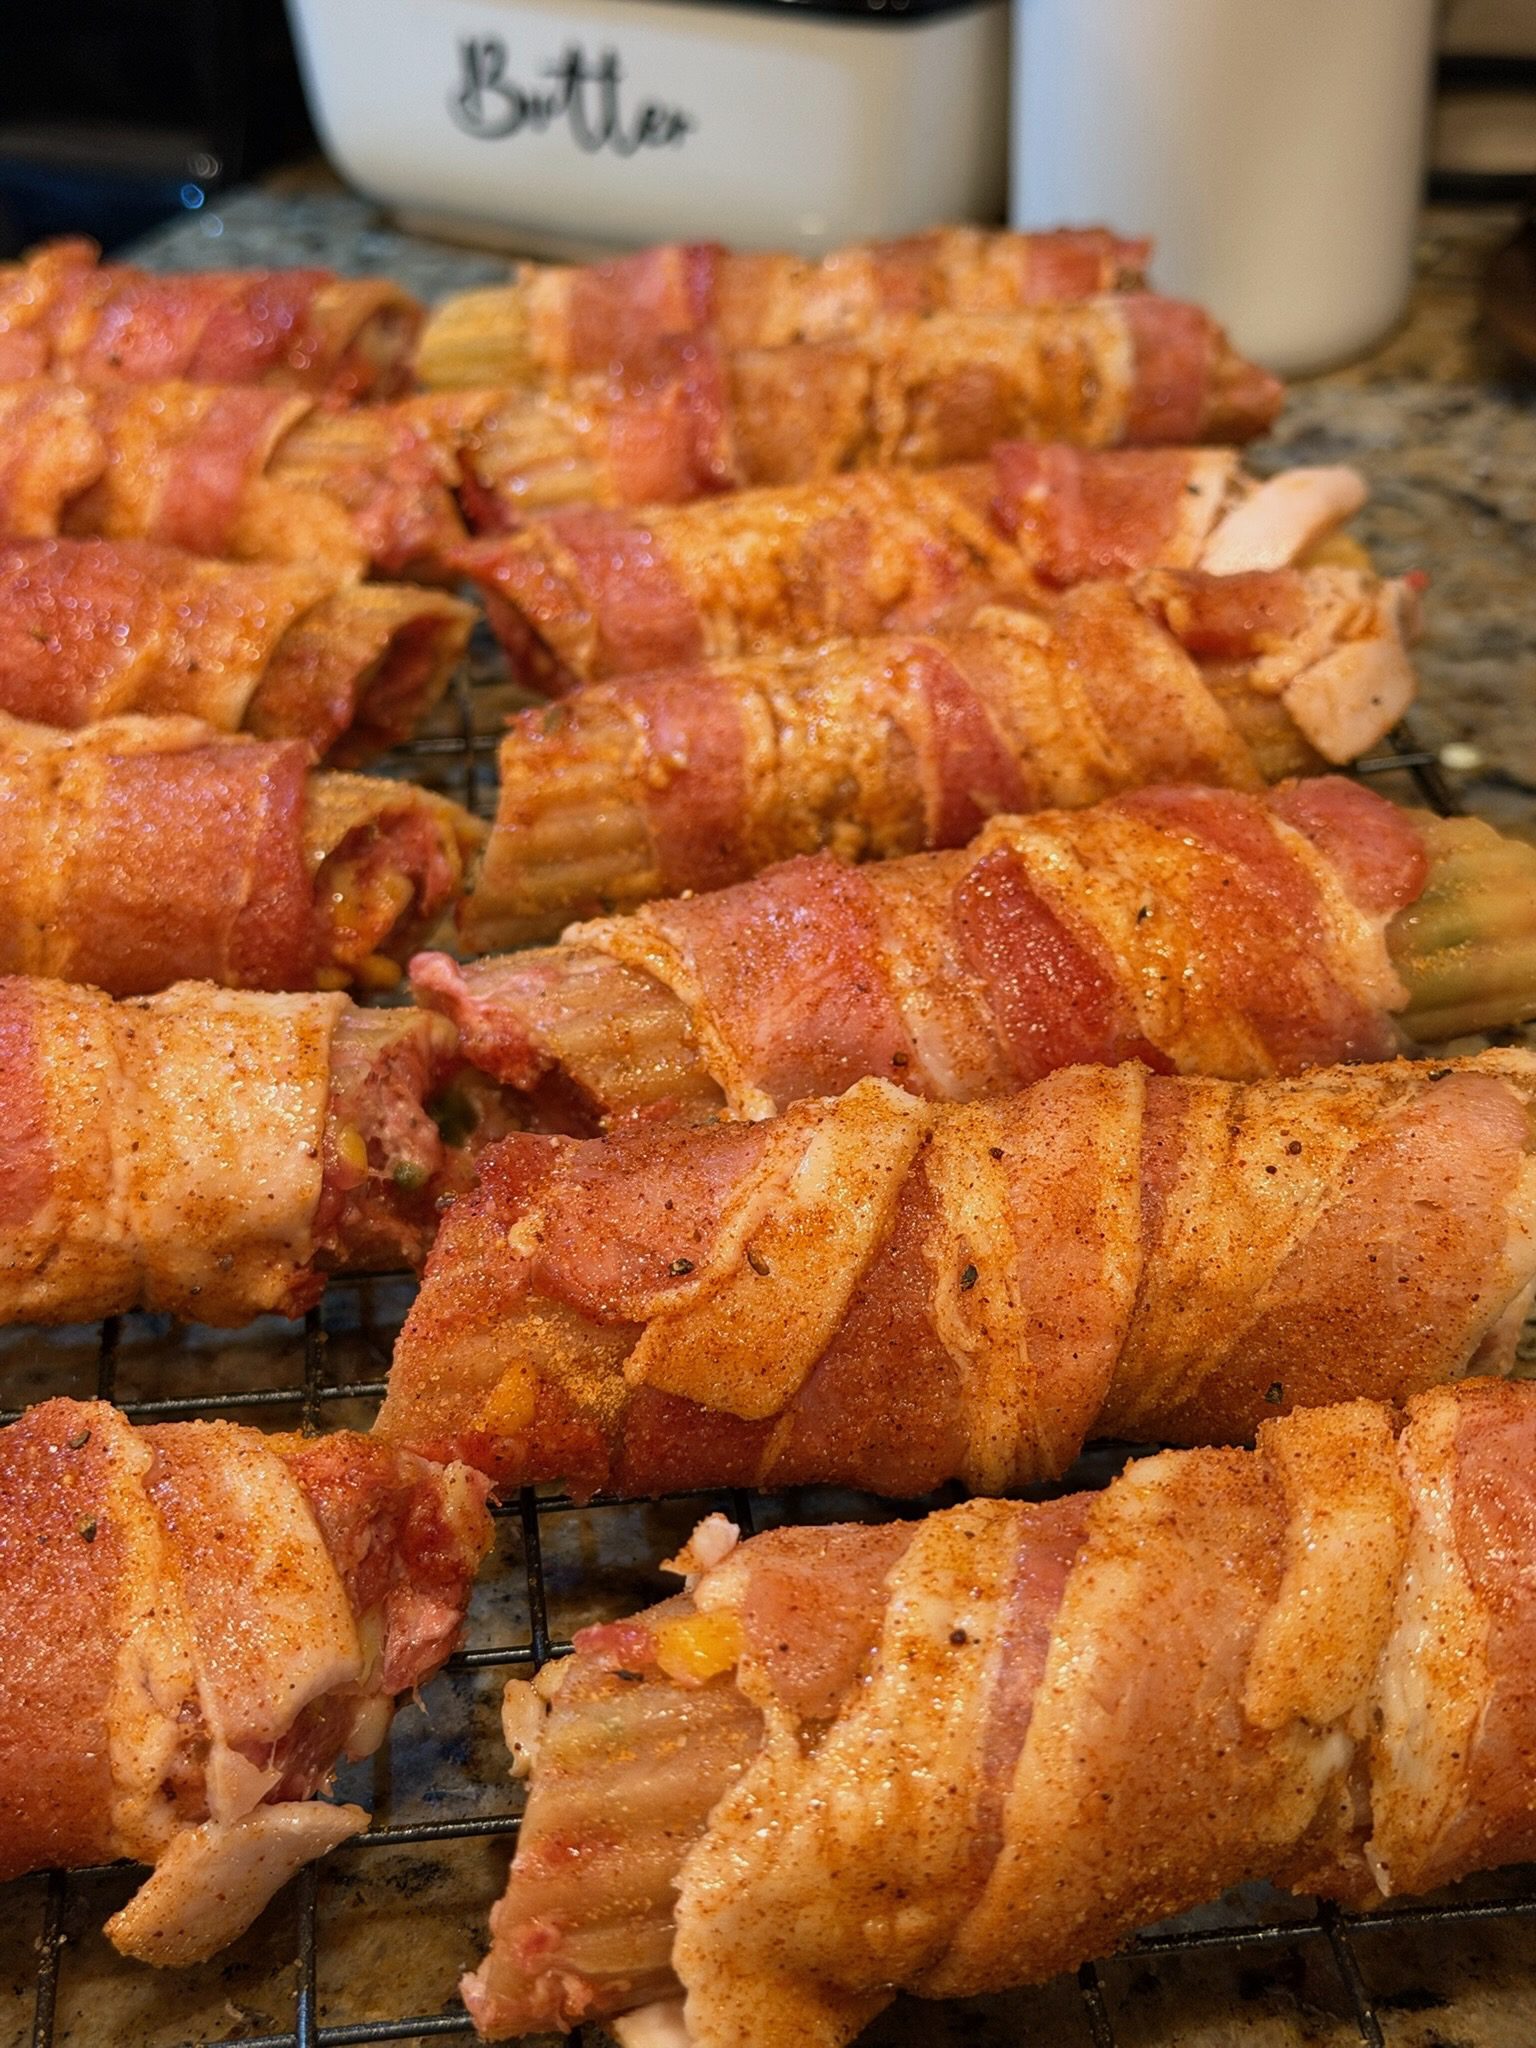
Place the prepared shotgun shells on a baking rack or baking sheet and refrigerate them for a minimum of four hours.
This is extremely important.
If you don't give the stuffed shells enough refrigerator time, the manicotti may still be too crunchy after cooking.
If your schedule allows it, we think overnight would be even better.
Why Do Shotgun Shells Need to Rest Before Smoking?
Because we're starting with completely uncooked pasta.
While the assembled shotgun shells sit in the refrigerator, the manicotti begins absorbing moisture from the filling. That gives the pasta a head start before it goes onto the smoker.
We refrigerated ours for four hours. The pasta softened nicely wherever it was protected by bacon, but we did have a little crunch in spots where the manicotti was exposed.
Honestly, we liked it that way.
But if you want the softest possible manicotti, give the shotgun shells an overnight rest and make sure you cover as much exposed pasta as possible with the bacon.
Smoke the Shotgun Shells
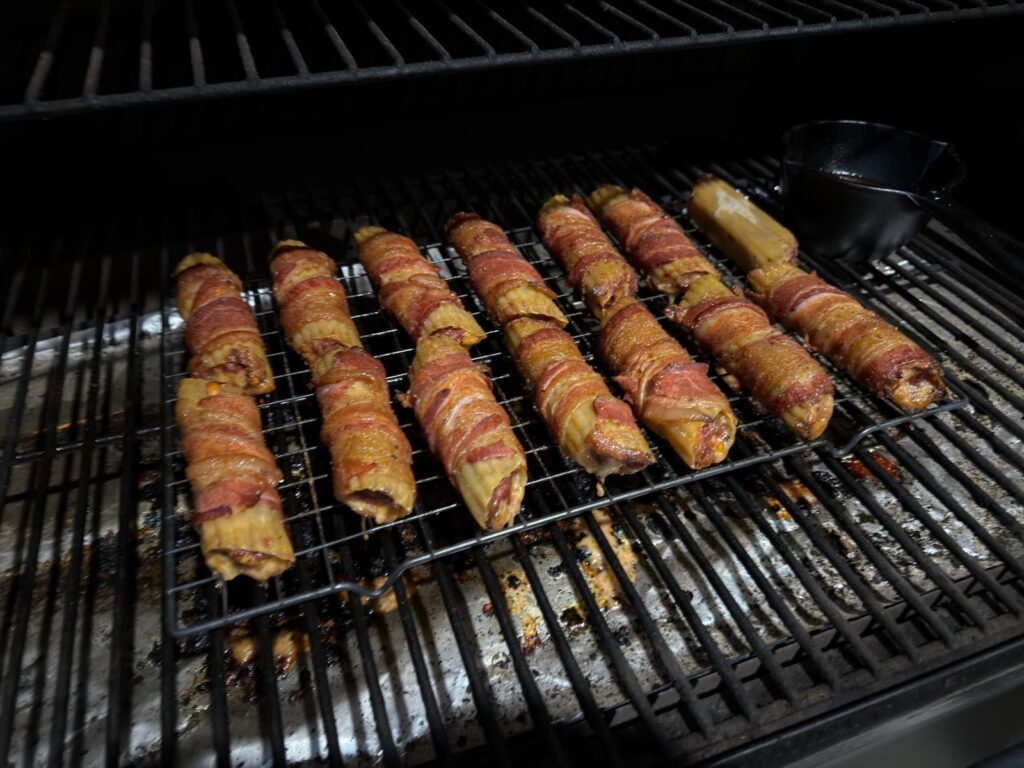
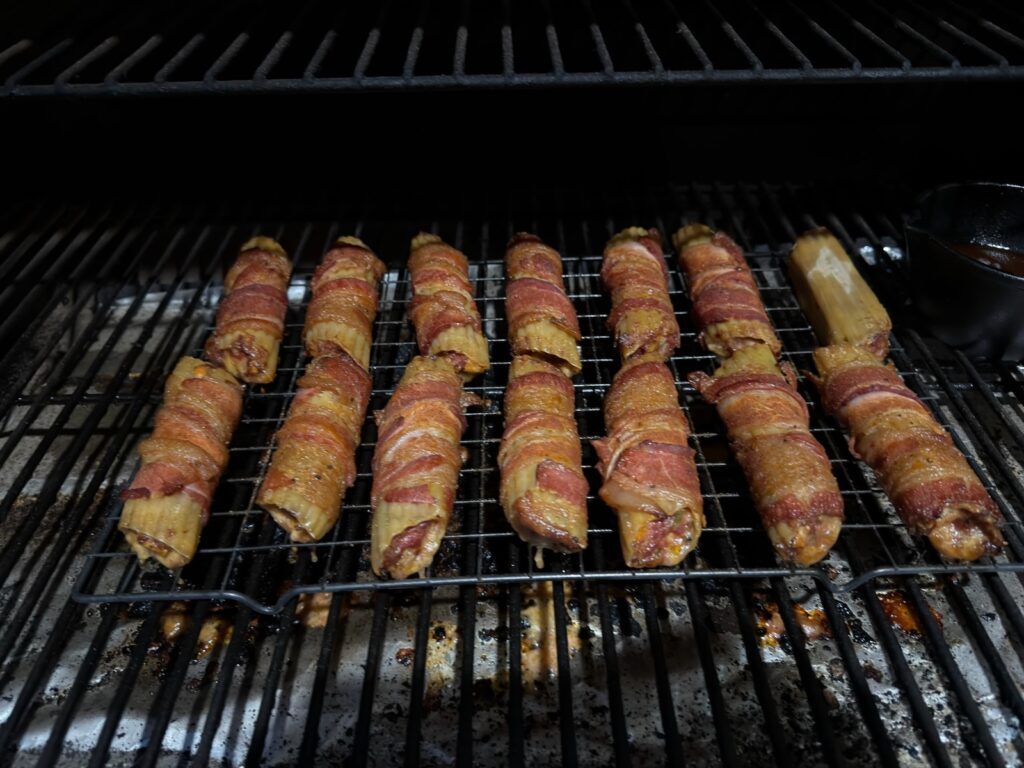
Preheat your smoker to 300°F.
Place the chilled shotgun shells on the grill and close the lid.
Smoke for 60 minutes.
You don't need to flip them.
Warm the Honey Barbecue Sauce
As the shotgun shells approach the 60-minute mark, warm about ½ cup of honey barbecue sauce.
You can certainly warm it in the microwave, but we like to pour ours into a small cast-iron pan and put it right on the grill for about 10 minutes while the shotgun shells finish cooking.
The warm sauce is easy to brush over the bacon and begins glazing almost immediately.
Glaze and Finish
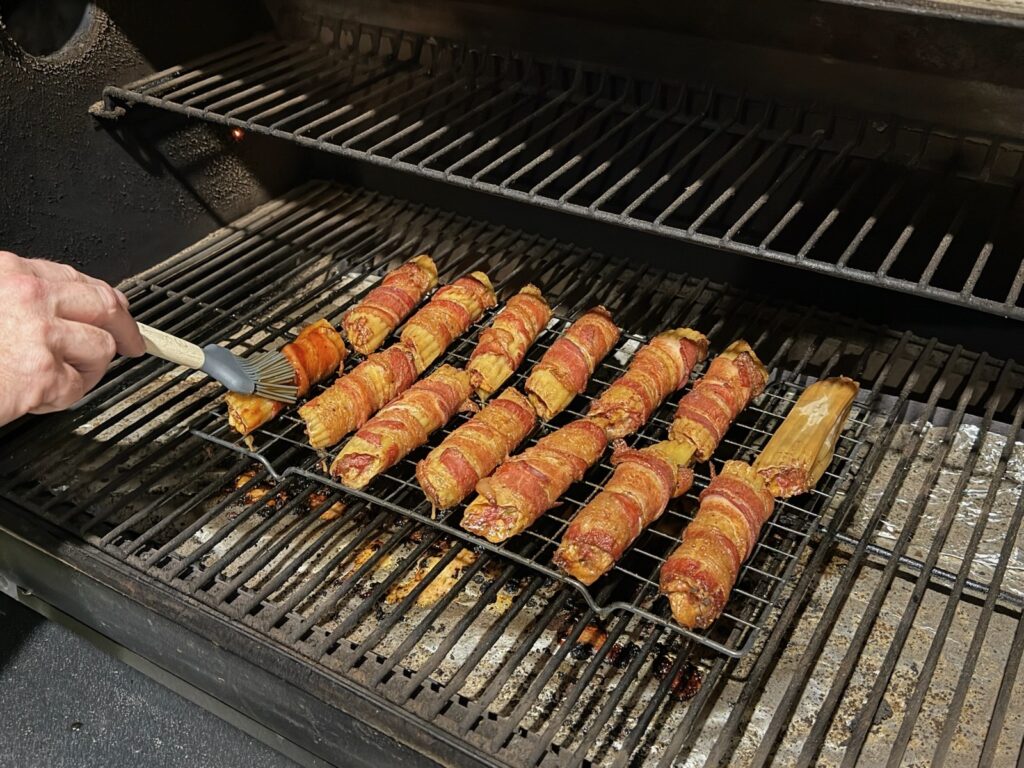
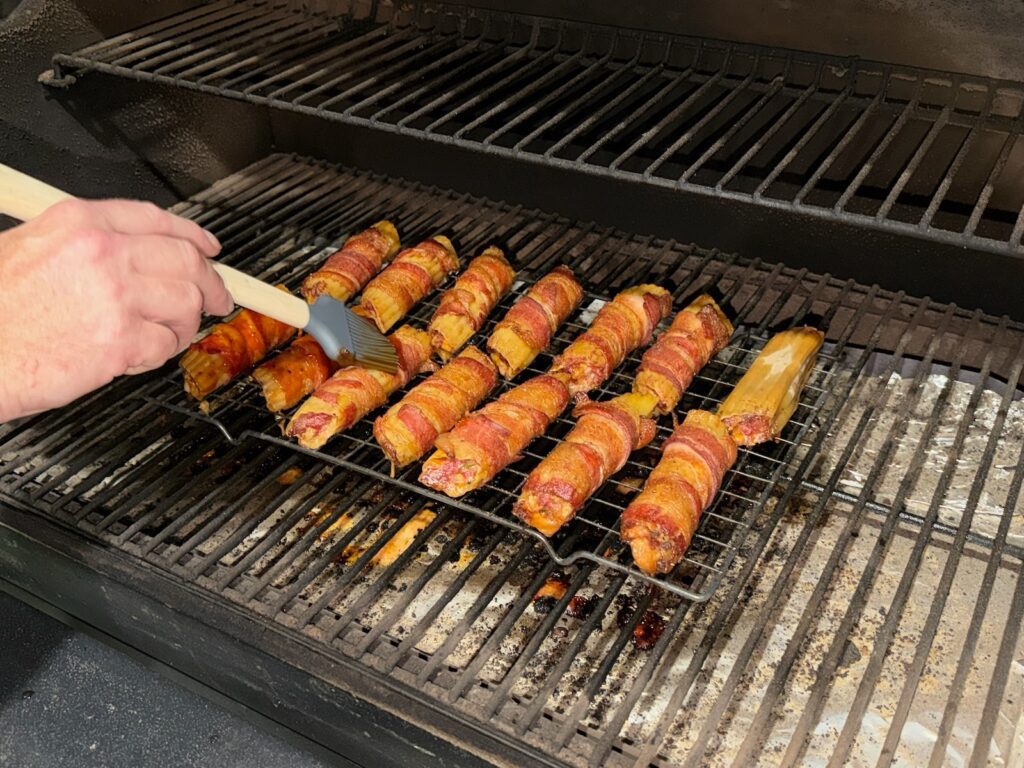
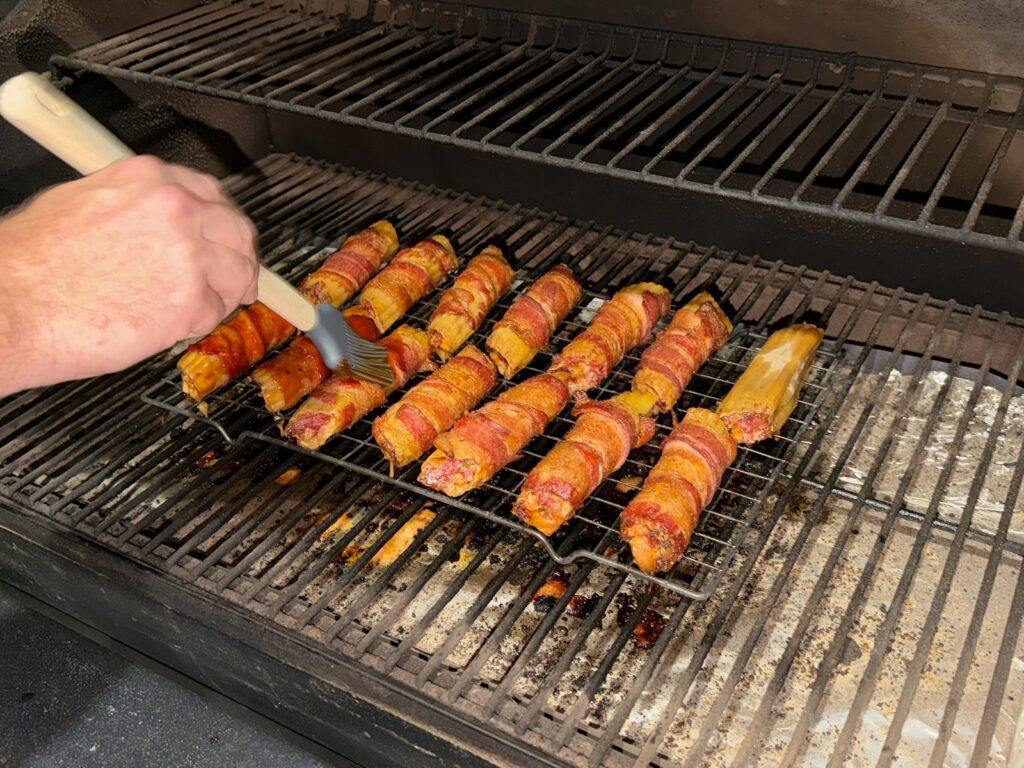
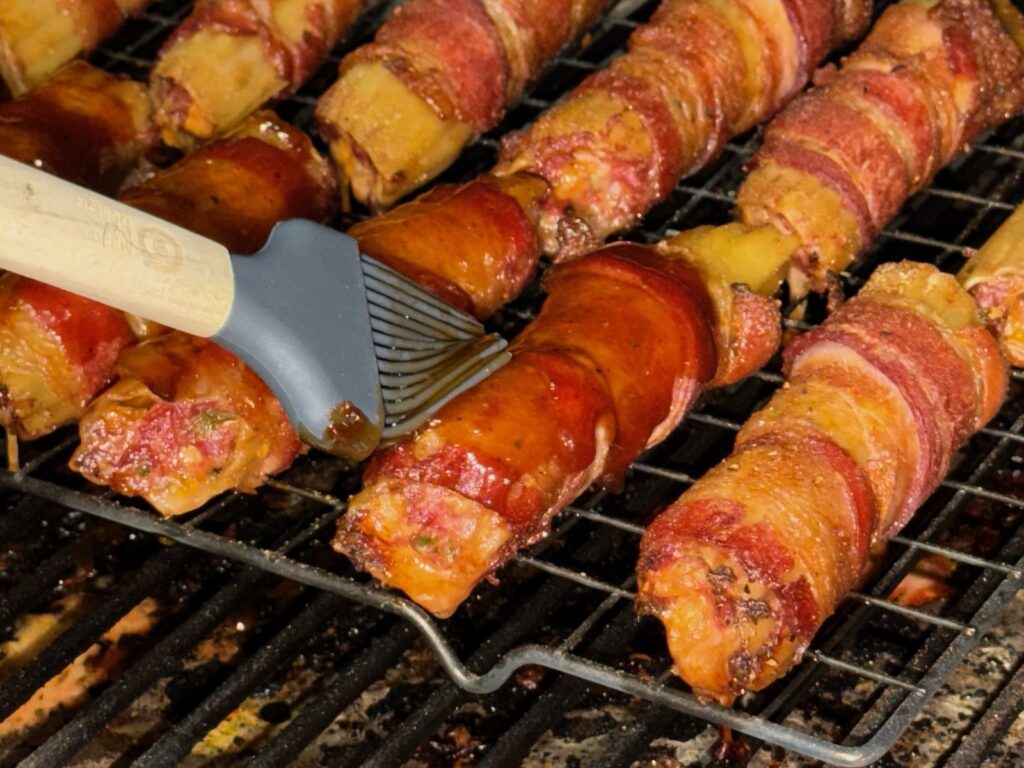
After the shotgun shells have cooked for 60 minutes, open the smoker and lightly baste them with warm honey barbecue sauce on all sides.
Close the lid and cook for another 10 minutes.
That final 10 minutes sets the sauce and gives the bacon that beautiful sticky, glossy finish.
When Are Shotgun Shells Done?
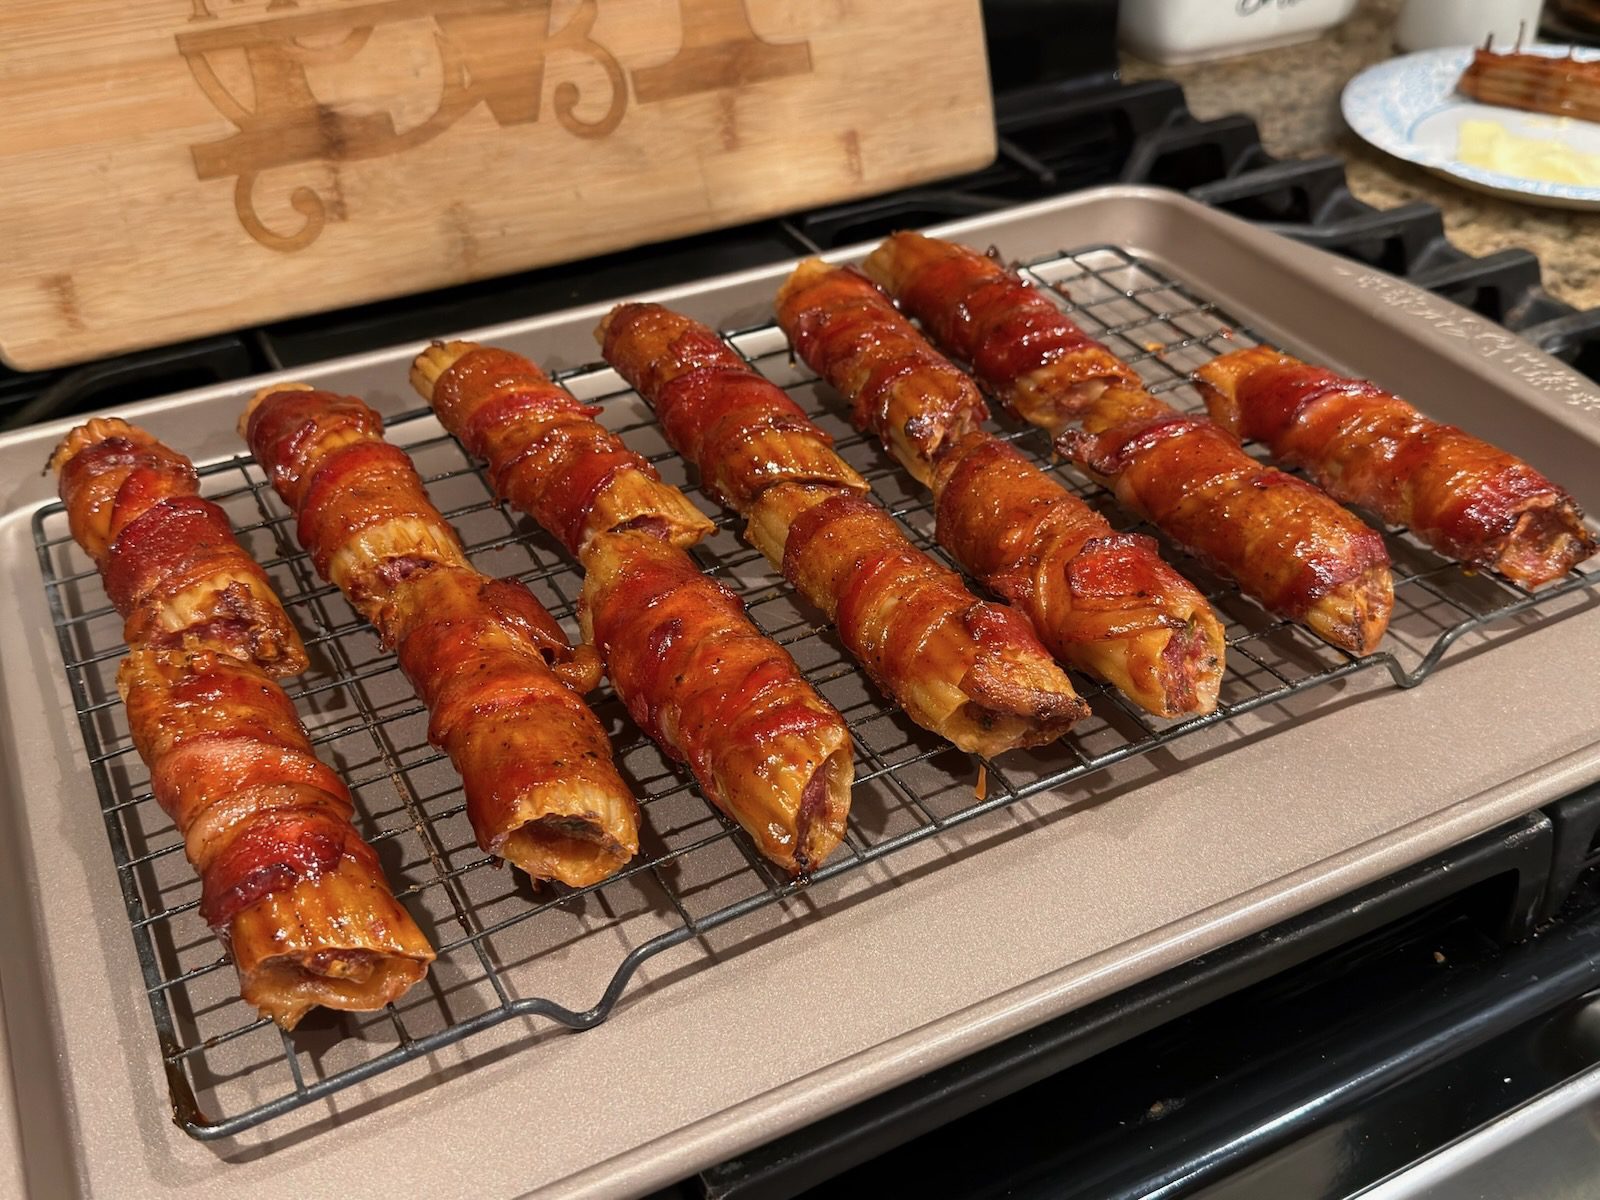
The meat filling needs to reach an internal temperature of at least 165°F.
Here's something important we discovered while making ours:
The meat may reach 165°F before the manicotti is completely tender.
At the 60-minute mark, ours had already passed 165°F, and that's perfectly fine. We still gave them the full 10-minute glazed finish.
Don't pull the shotgun shells early just because the meat has reached temperature. The pasta needs the cooking time, too.
After 70 minutes total, remove the shotgun shells from the grill and let them rest for about 5 minutes before serving.
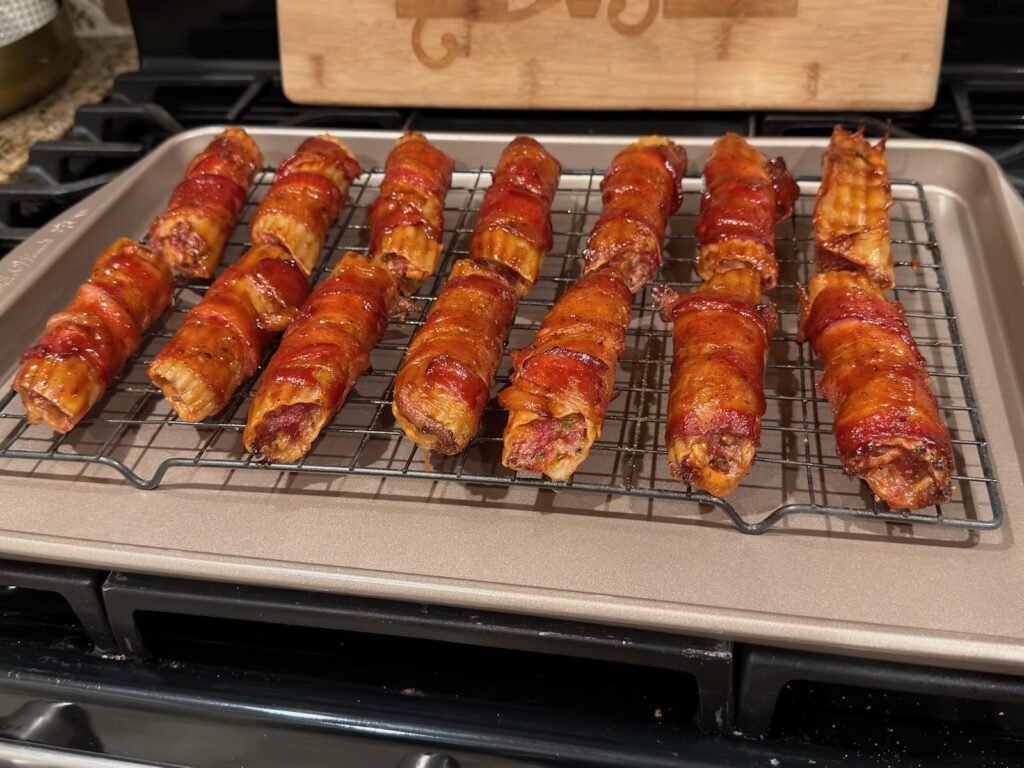
And be careful with that first bite. The cheesy meat filling will be hot!
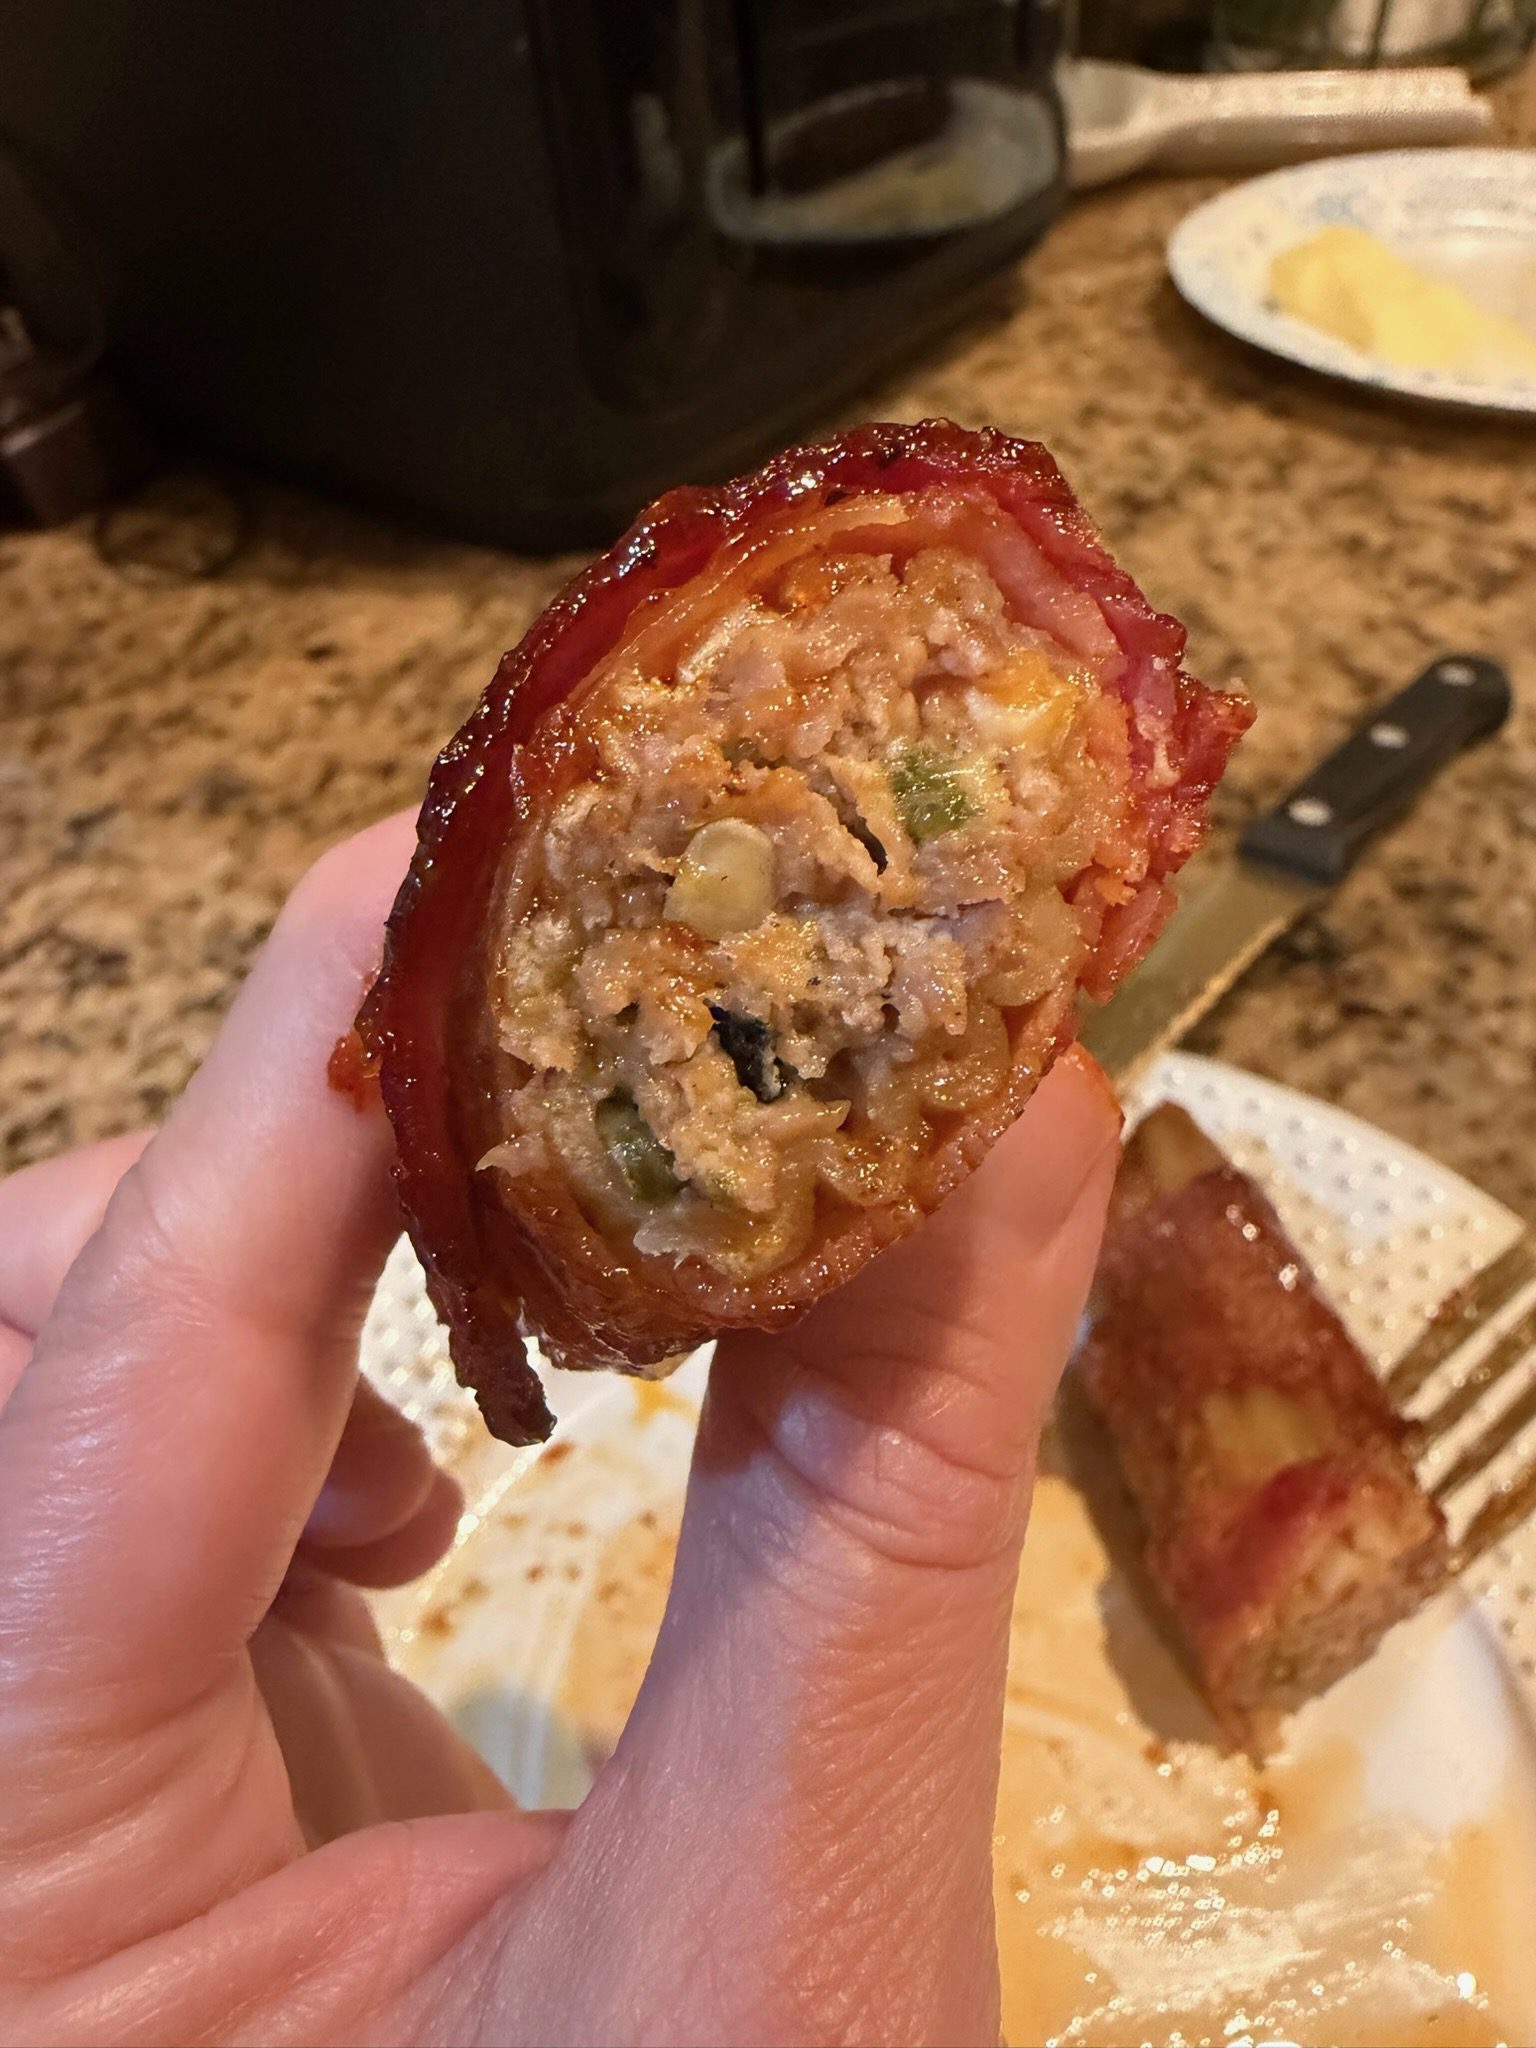
What Do Smoked Shotgun Shells Taste Like?
These turned out really great! The beef and Italian sausage make the filling rich and savory, and the two cheeses keep everything moist and creamy.
The fire-roasted poblanos add a mild chile heat and another smoky note without taking over the dish.
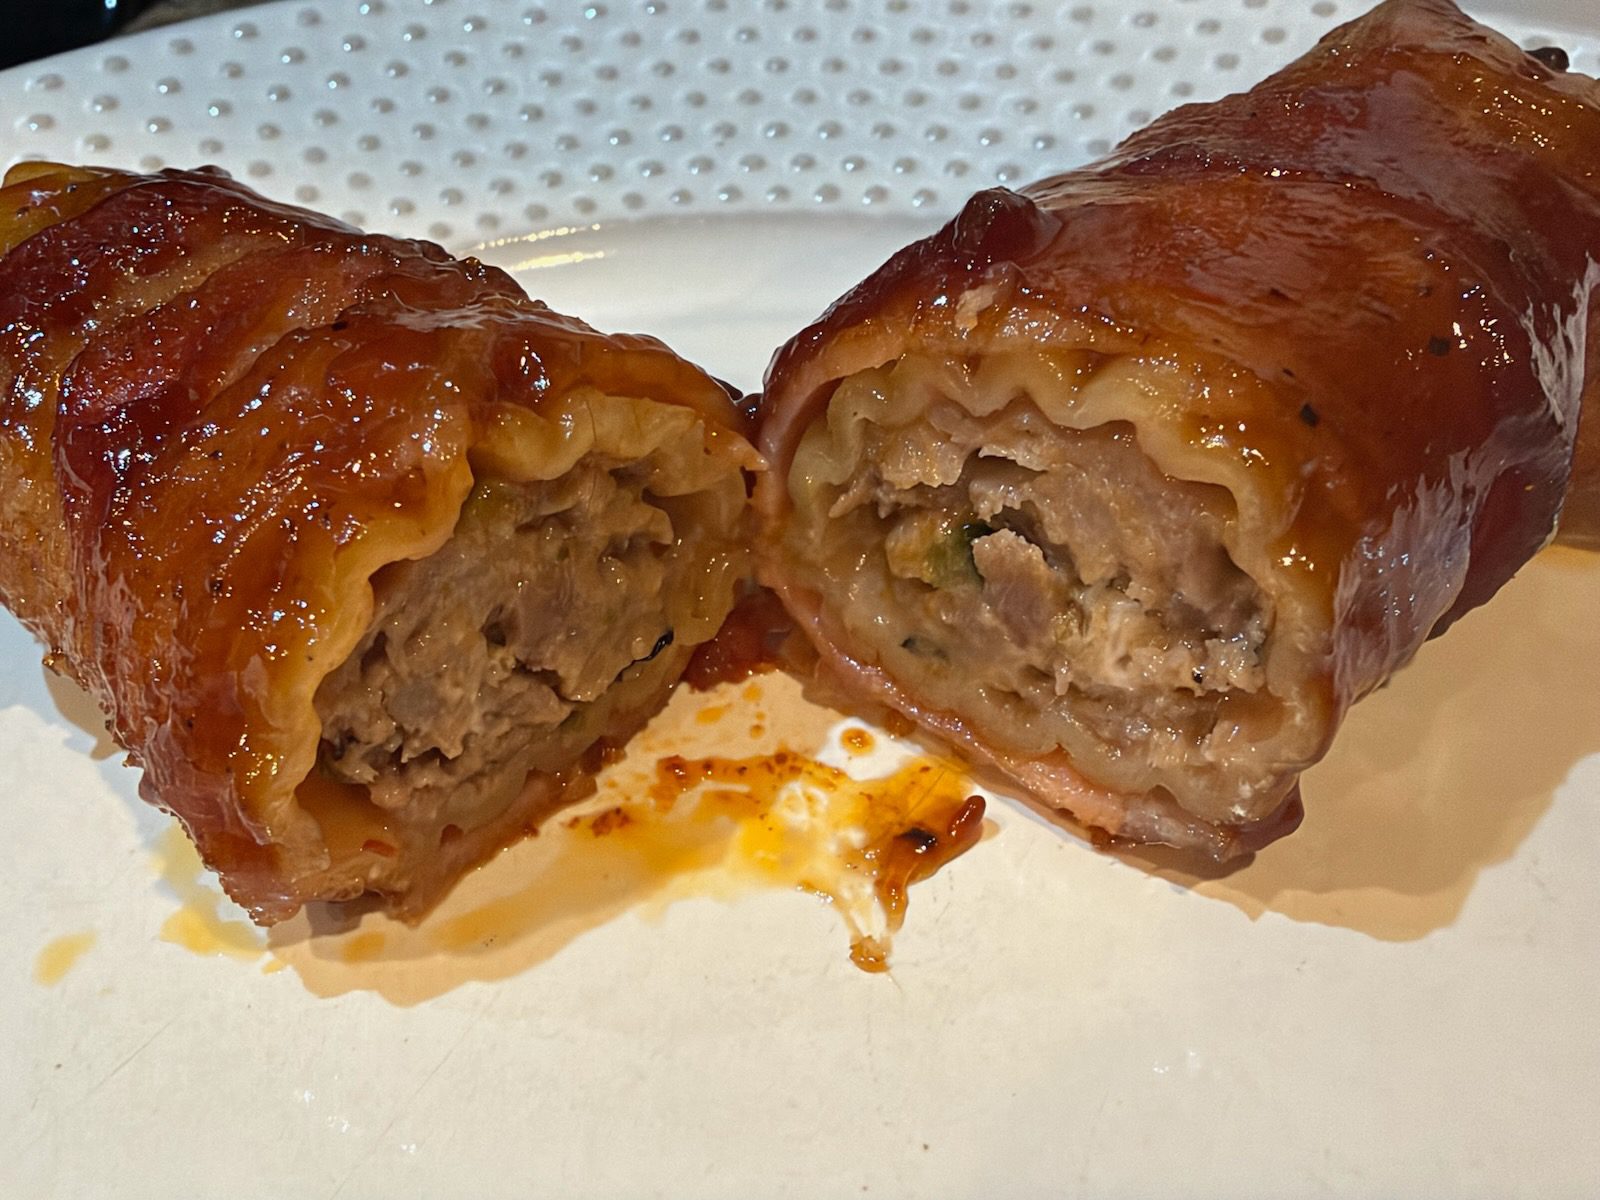
Then you've got the bacon wrapped around the outside.
The Honey Hog seasoning and honey barbecue sauce add just enough sweetness to balance all of that savory meat, cheese, and bacon. During those last 10 minutes, the sauce gets sticky and caramelized around the outside.
We ended up with a little crunch anywhere the manicotti wasn't touching the bacon, but we actually enjoyed that texture.
Altogether, you've got smoky, savory, cheesy, a little spicy, and a little sweet in every bite.
We Had Leftover Filling — So We Made Sliders
Here's something we weren't expecting. We stuffed 14 manicotti shells and still had quite a bit of filling left.
We probably could have made closer to 20 shotgun shells if we'd had more manicotti and bacon. But we didn't.
So...sliders it was!
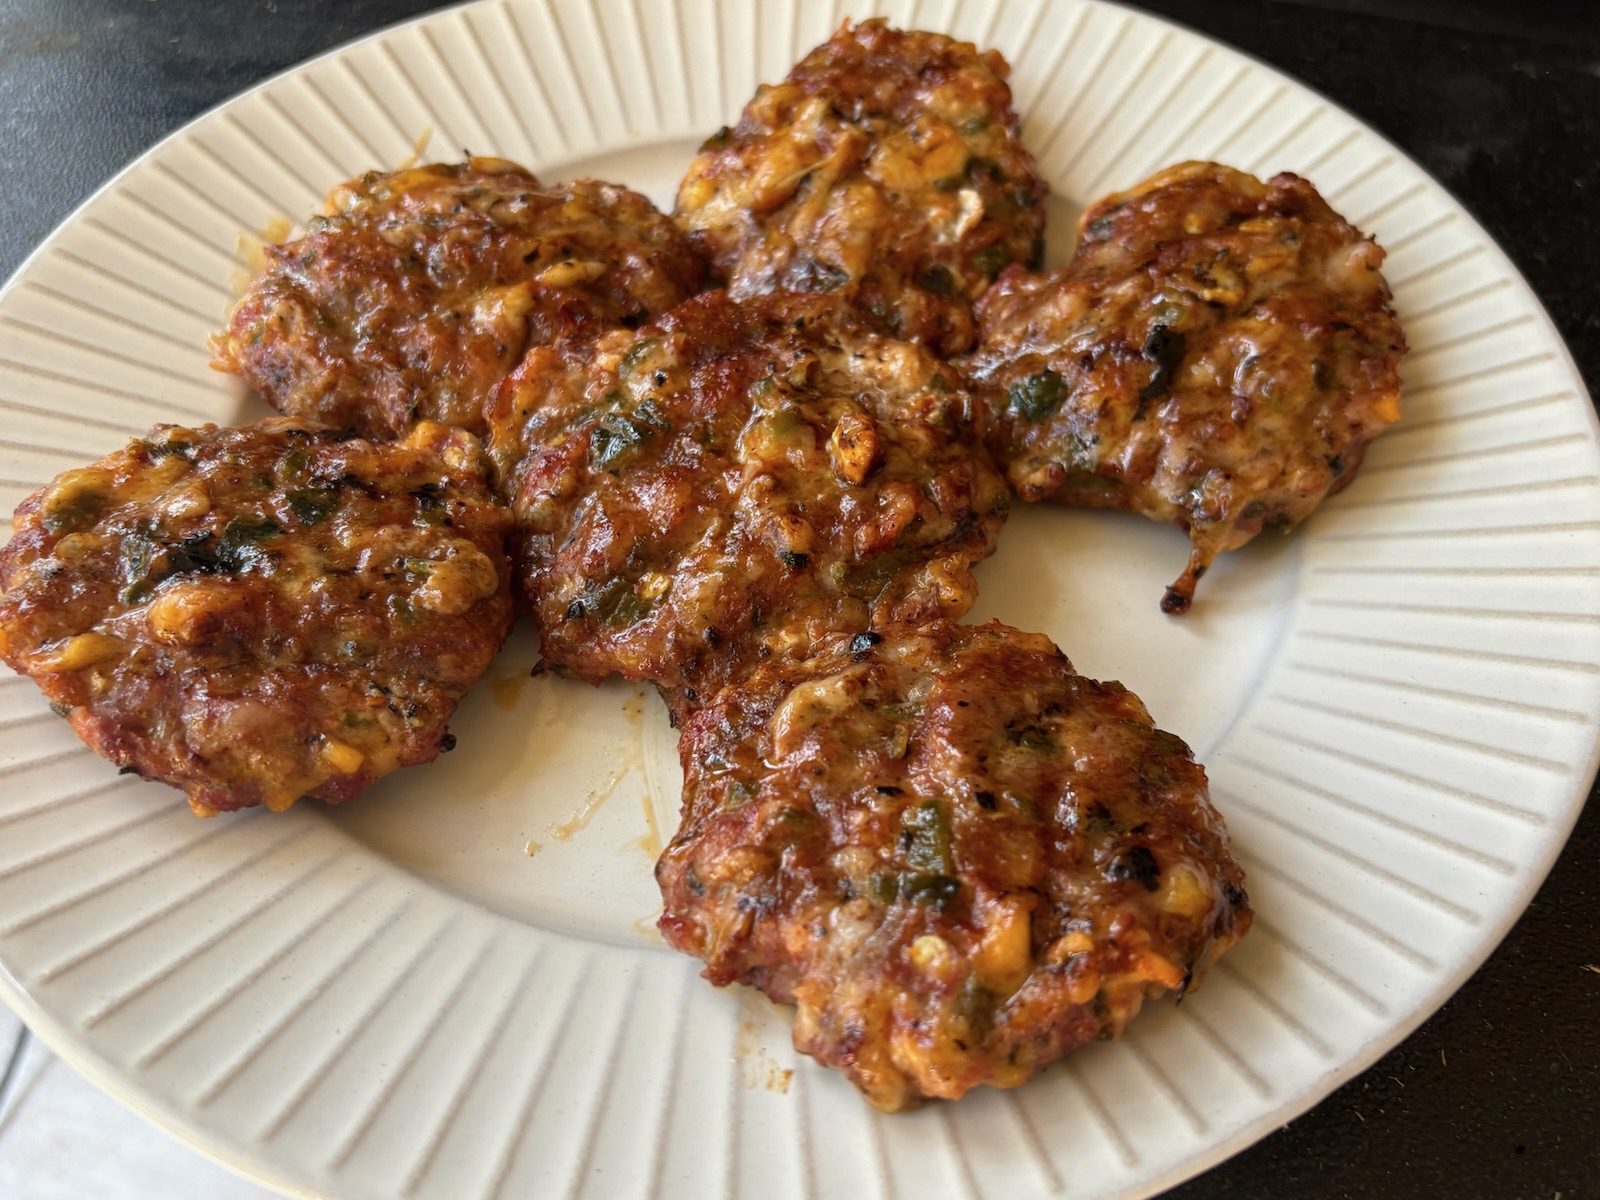
We formed the leftover meat mixture into small patties, seasoned both sides with Honey Hog, and put them on the grill.
They cooked for approximately 20 minutes, and we flipped them halfway through. Once they reached an internal temperature of 165°F, we pulled them from the grill.
We served the patties on Hawaiian rolls with a little honey barbecue sauce poured over the top.
They were absolutely delicious. The full recipe will be coming soon.
So if you end up with extra filling, don't throw it away. Either pick up additional manicotti and bacon or turn it into a second meal like we did.
Our Tips for the Best Shotgun Shells
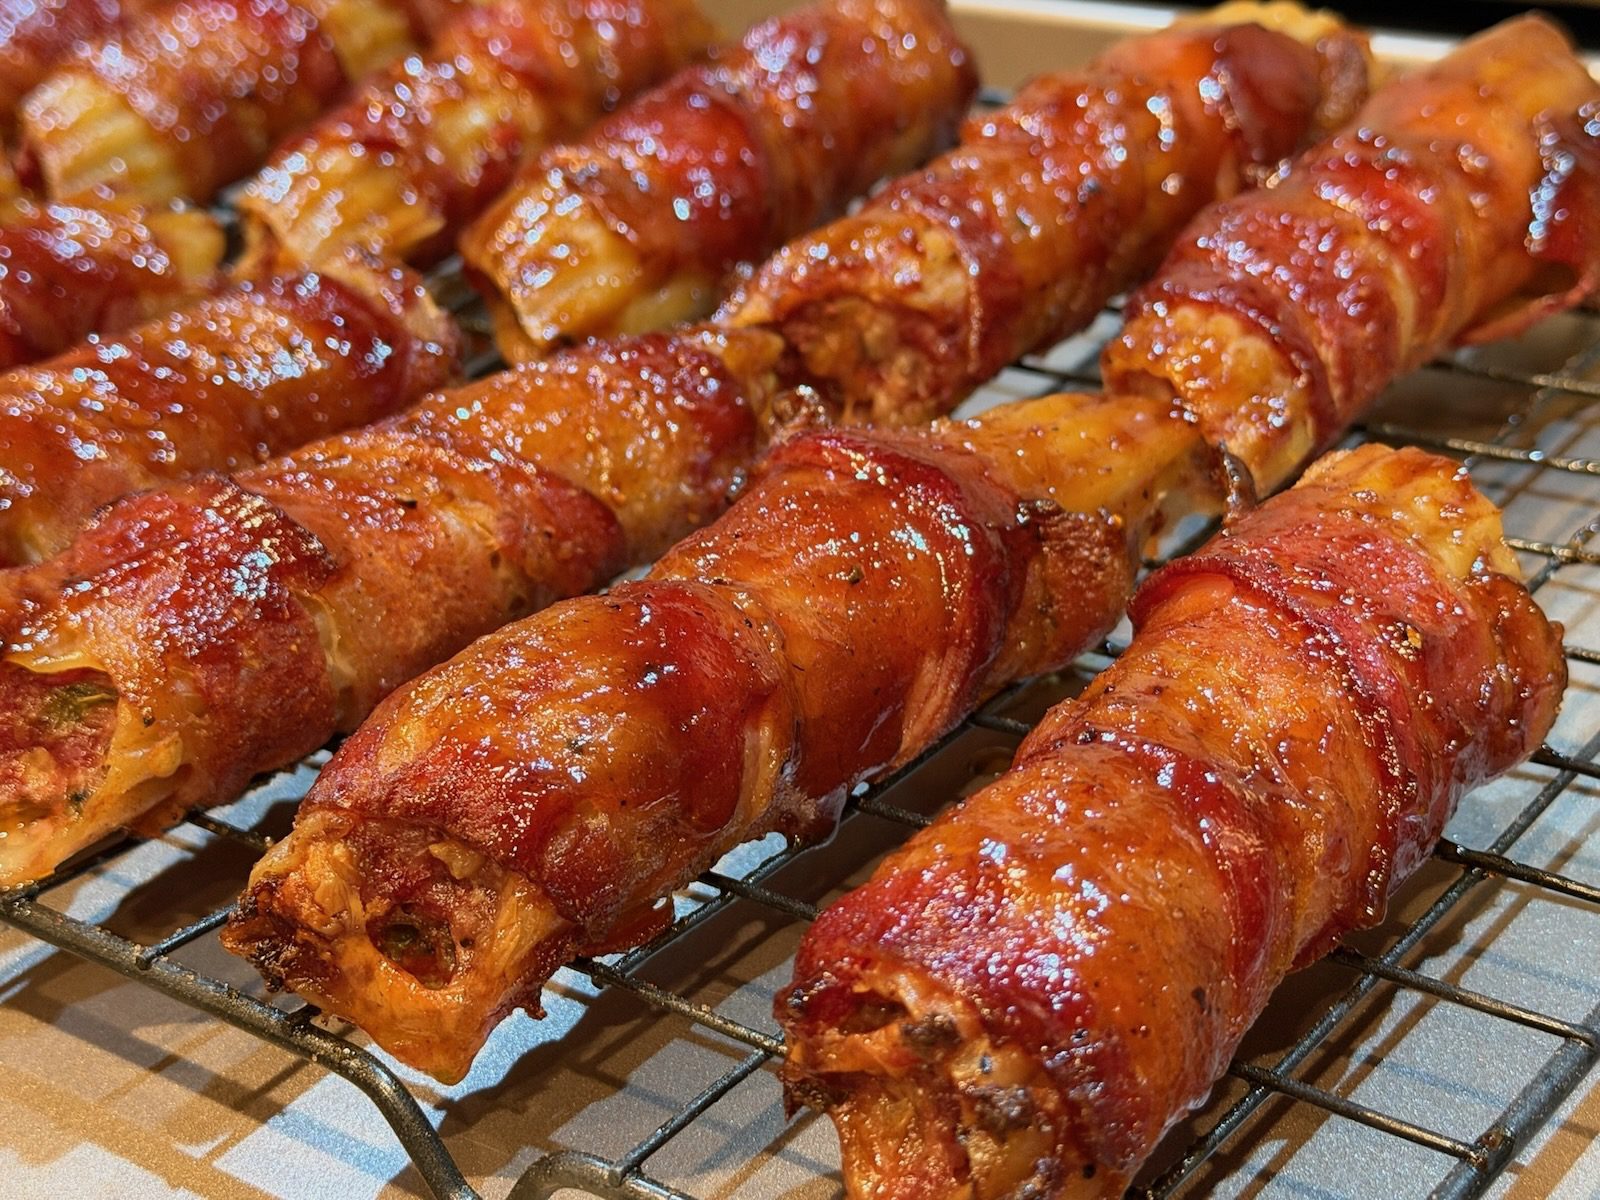
- Don't boil the manicotti first. Use it straight from the box.
- Give yourself enough time. The assembled shotgun shells need at least four hours in the refrigerator.
- Make them the night before if you can. We think an overnight rest would make the pasta even more tender.
- Use thin-sliced bacon. It wraps the shells better and cooks more efficiently.
- Cover as much pasta as possible. Any exposed manicotti may stay a little crunchy.
- Don't worry about a few crunchy spots. We had some and thought they were really good.
- Season the outside generously. The Honey Hog gives you that sweet-and-savory BBQ flavor before the sauce ever goes on.
- Warm the barbecue sauce before brushing. It spreads easily and starts glazing right away.
- Use an instant-read thermometer. The filling needs to reach at least 165°F.
- Give the pasta its full cooking time. Even if the filling reaches 165°F early, the manicotti still needs time to soften.
- Rest them for five minutes. The filling is extremely hot when these first come off the smoker.
Variations
Jalapeño Shotgun Shells
Replace the poblano peppers with jalapeños if you want a little more heat.
Hatch Chile Shotgun Shells
Roasted Hatch chiles would also be terrific in the filling and would fit right in with the smoky BBQ flavors.
Turn Up the Heat
Use hot Italian sausage or a spicy barbecue sauce if you prefer hotter shotgun shells.
Change the Cheese
We loved Colby Jack because it melts well and doesn't overpower the other flavors, but Pepper Jack would be a natural substitute if you want another layer of heat.
Can You Make Shotgun Shells the Night Before?
Yes — and after making this batch, that's probably what we'd recommend.
You have to refrigerate the assembled shells for at least four hours anyway, so making them the night before makes a lot of sense.
Stuff and wrap them in the evening, season them, cover and refrigerate overnight, then put them on the smoker the next day.
It's one less thing to worry about when you're getting everything else ready for a backyard cookout.
How to Store Leftovers
Store leftover shotgun shells in an airtight container in the refrigerator for up to 3–4 days.
We'd recommend reheating them in the oven, air fryer, or smoker rather than the microwave if you want to preserve some of the texture of the bacon.
Heat them until they're hot throughout.
Frequently Asked Questions
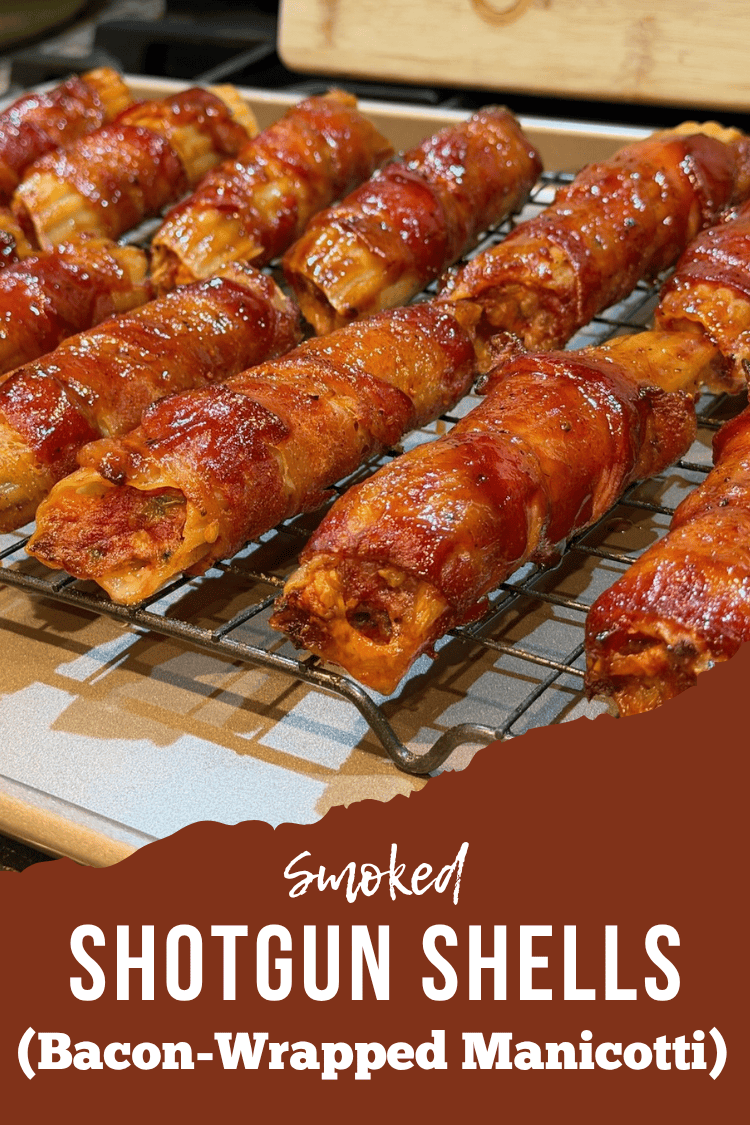
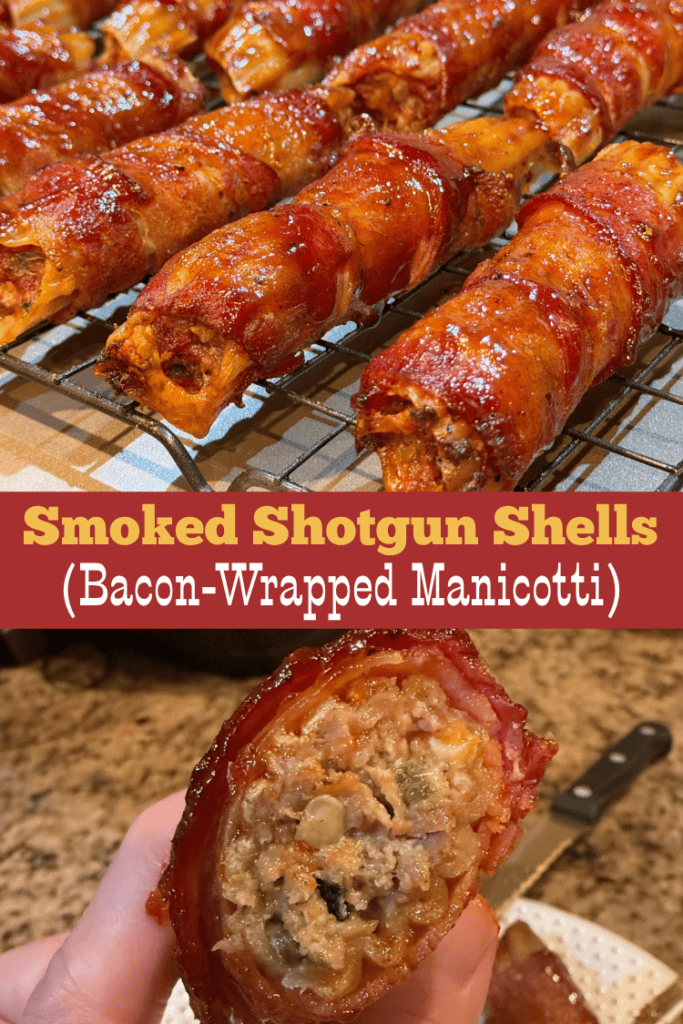
Smoked shotgun shells are uncooked manicotti tubes stuffed with a meat-and-cheese mixture, wrapped in bacon, seasoned, and cooked on a smoker or grill.
No. We used the manicotti completely dry, straight from the box. That's why the refrigerator rest is so important.
We refrigerated ours for four hours, which we consider the minimum. They turned out well, although we had a little crunch in the areas of pasta that weren't touching bacon. If possible, we'd recommend refrigerating them overnight.
Check the bacon coverage. We noticed that our manicotti was more likely to remain slightly crunchy anywhere it wasn't touching bacon. Make sure you also give the assembled shells at least four hours in the refrigerator before cooking them.
Absolutely. In fact, we recommend it. The overnight refrigerator rest gives the uncooked manicotti plenty of time to begin absorbing moisture from the filling.
We smoked ours at 300°F. They cooked for 60 minutes, then we brushed them with warm honey barbecue sauce and cooked them for another 10 minutes.
The filling should reach at least 165°F. Ours were already past that temperature at the 60-minute mark, but we continued cooking them because the manicotti still needed the full cooking time.
From Our Backyard Grill
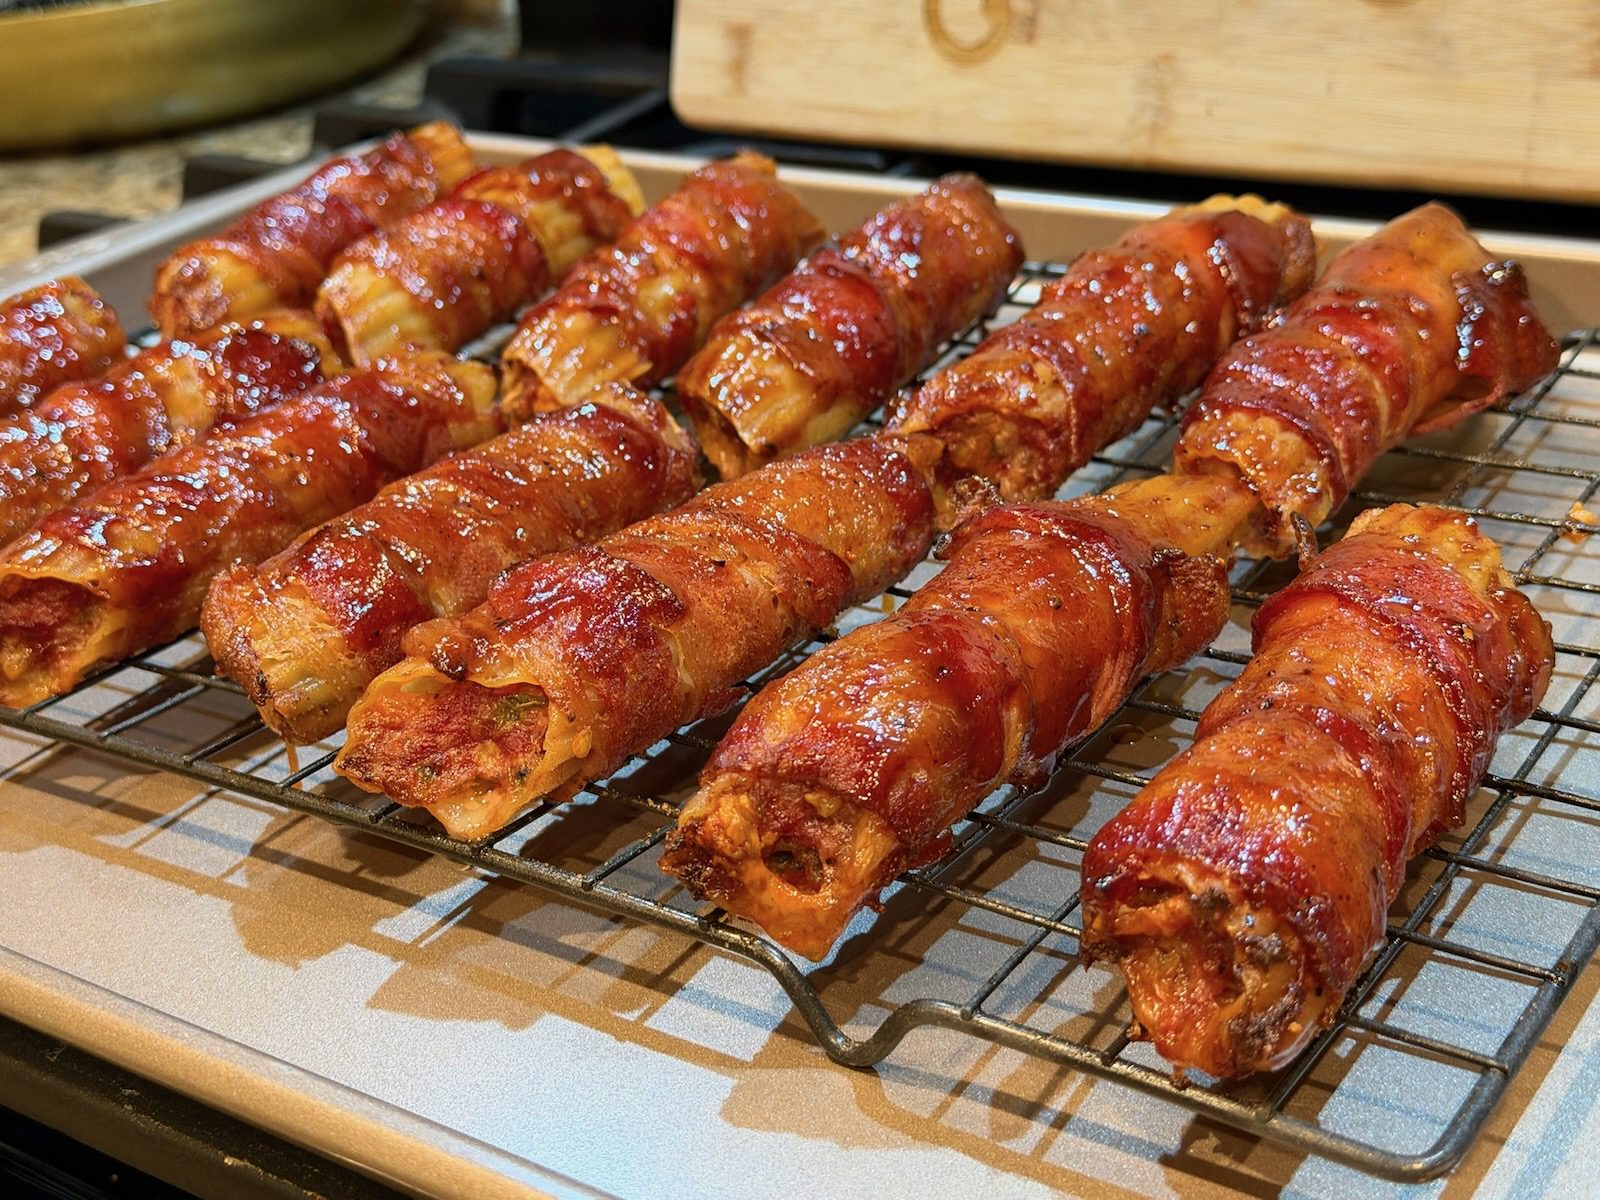
We had a lot of fun making these shotgun shells together, and they're definitely going on our list of recipes to make again.
They've got pretty much everything we love about backyard cooking in one package: beef, sausage, cheese, roasted peppers, bacon, barbecue seasoning, smoke, and a sticky-sweet glaze.
And apparently, if you make too much filling, you get BBQ sliders out of the deal. We don't see a downside there. Enjoy!
—Randi & Zach
Thanks for Stopping By!
If you make these delicious Shotgun Shells and love them, please leave a comment or review. And before you go, please pin some photos to your Pinterest boards!
About the Cooks
Randi and Zach Morrow are the duo behind Backyard Texas Grill, where good food usually starts with an idea, a hot grill, and a willingness to try something new. Zach is our resident pitmaster, bringing years of backyard grilling and smoking experience to the table, while Randi is right at home developing recipes, testing flavors, and jumping in wherever good food is happening. Together, they love creating hearty, approachable recipes like these Smoked Shotgun Shells—food meant to be cooked outside, shared with family and friends, and enjoyed around the table.
Smoked Shotgun Shells
These Smoked Shotgun Shells start with uncooked manicotti stuffed with a savory mixture of ground beef, Italian sausage, Colby Jack, cream cheese, and fire-roasted poblano peppers. Wrapped in bacon, seasoned with Honey Hog, and smoked at 300°F, they're finished with a sticky honey barbecue glaze for the perfect combination of smoky, savory, slightly spicy, and sweet.
Ingredients
- 1 pound 85/15 ground beef
- 1 pound ground Italian sausage
- 8 ounces thick-cut shredded Colby Jack cheese
- 4 ounces cream cheese, softened
- 2 large poblano peppers
- 1 (8-ounce) box uncooked manicotti tubes
- 1 (12-ounce) package thin-sliced bacon
- Meat Church Honey Hog BBQ seasoning, to taste
- ½ cup honey barbecue sauce
Instructions
- Roast the peppers. Fire-roast the poblano peppers over an open flame, turning until blackened on all sides. Allow them to cool enough to handle, then peel away the charred skin and remove the stems. Finely chop the softened peppers, including the seeds.
- Prepare the filling. Add the ground beef, Italian sausage, chopped poblano peppers, shredded Colby Jack, and softened cream cheese to a large bowl. Using gloved hands, mix until everything is thoroughly combined.
- Stuff the manicotti. Carefully stuff the uncooked manicotti tubes with the meat mixture. Use your fingers or a piping bag, taking care not to crack the dry pasta.
- Wrap with bacon. Wrap each stuffed manicotti tube with one slice of thin bacon, covering as much of the exposed pasta as possible.
- Season. Generously season all sides of the bacon-wrapped shells with Honey Hog BBQ seasoning.
- Refrigerate. Place the prepared shotgun shells on a baking rack or baking sheet and refrigerate for a minimum of 4 hours. For softer pasta, refrigerate overnight.
- Preheat the smoker. Heat the smoker to 300°F.
- Smoke. Place the shotgun shells on the grill, close the lid, and cook for 60 minutes.
- Warm the sauce. Near the end of the 60-minute cooking time, warm the honey barbecue sauce. Randi and Zach like to place it in a small cast-iron pan on the grill for about 10 minutes.
- Glaze. After the shotgun shells have cooked for 60 minutes, lightly brush them with warm barbecue sauce on all sides.
- Finish cooking. Close the smoker and cook for another 10 minutes. The meat filling should reach an internal temperature of at least 165°F. Even if it reaches that temperature earlier, allow the shells the full cooking time so the manicotti has time to soften.
- Rest and serve. Remove the shotgun shells from the grill and rest for 5 minutes before serving hot.
Notes
Don't skip the chill time. Four hours is the minimum. The uncooked manicotti absorbs moisture from the filling while it rests, helping it soften during cooking. Overnight refrigeration is even better.
Cover the pasta with bacon. Areas of manicotti that aren't touching bacon may remain a little crunchy. We actually enjoyed those crispier spots, but good bacon coverage will produce softer pasta.
Pepper substitutions: Jalapeños or Hatch chiles can be substituted for the poblano peppers.
Leftover filling: This batch filled 14 manicotti tubes with quite a bit of filling left over. If you have additional manicotti and bacon, the filling should make approximately 18–20 shotgun shells. Otherwise, turn the extra filling into BBQ sliders.
Nutrition Information:
Yield: 18 Serving Size: 1Amount Per Serving: Calories: 260Total Fat: 19gSaturated Fat: 9gUnsaturated Fat: 10gCholesterol: 60mgSodium: 433mgCarbohydrates: 6gFiber: 0gSugar: 3gProtein: 17g